If you are an iPhone user, you must have relished all the apps in it, including browsing the internet. In this expedition, you may need to save some crucial web pages to access later. For this, you may need to know where the bookmark in the iPhone is and the process to use it. Being aware of the same, users often ask queries like How to bookmark on iPhone.
If you are one of those who are looking for the answer to the same, you are at the right place. Here, in this post, we will look into How to bookmark on iPhone, we will also look into how to synchronize these in all your devices.
Where is the Bookmark Option in the iPhone?
When the user feels a webpage is crucial and feels the need to visit it later again, they may look to save it somewhere. This is where the Bookmark gets its role. Bookmarking is the way in which the needed web pages can be saved effortlessly to access later. Bookmark options can be evident in all browsers. While you can find these on the browser screen, if not, you can find a bookmark option in the additional options list.
How to Bookmark on iPhone?
Saving a bookmark on an iPhone is often effortless, as the user is often a click away from saving the site. While some users are bewildered to know the same, the process is as easy as that in android and other devices. As far as the iPhone is considered, most of the users relish browsing from Safari. That being the case, we will look into How to bookmark on iPhone through Safari.
How to Add Bookmarks on iPhone through Safari?
As depicted in the previous lines, if you ask: How to bookmark on iPhone, the process in safari is not complicated. Comprehending the appropriate steps can let you bookmark any site of your choice. Here is what you can do:
Step 1: Navigate to Safari app on your iPhone and click on it to open
Step 2: Now, search for and go to the webpage that you want to save or Bookmark
Step 3: Check for an option that looks like an Open book. This is the action box, tap on it.

Step 4: You will be asked to make any edits in the to be saved bookmark. Make changes in areas like name and location.
Step 5: When the bookmark is all ready, check for the Save options and tap on it to confirm it to be saved.
Now, your bookmark is saved. You can always check back here and open the webpage later.
How to Synchronize Bookmarks with other Devices
It is common for Apple users to own more than one device. For instance, a person may have an iPhone, and a Macbook. In such scenarios, bookmarking in iPhone may not be enough, as they may need to access the same webpage from Macbook. Therefore, it is crucial to synchronize all the saved bookmarks to get accessed in all your devices. Here is how you can do it:
Step 1: Navigate to the Settings app in your iPhone and tap on it to open.
Step 2: Once the settings page is opened, you can see your name on the top; tap on it.
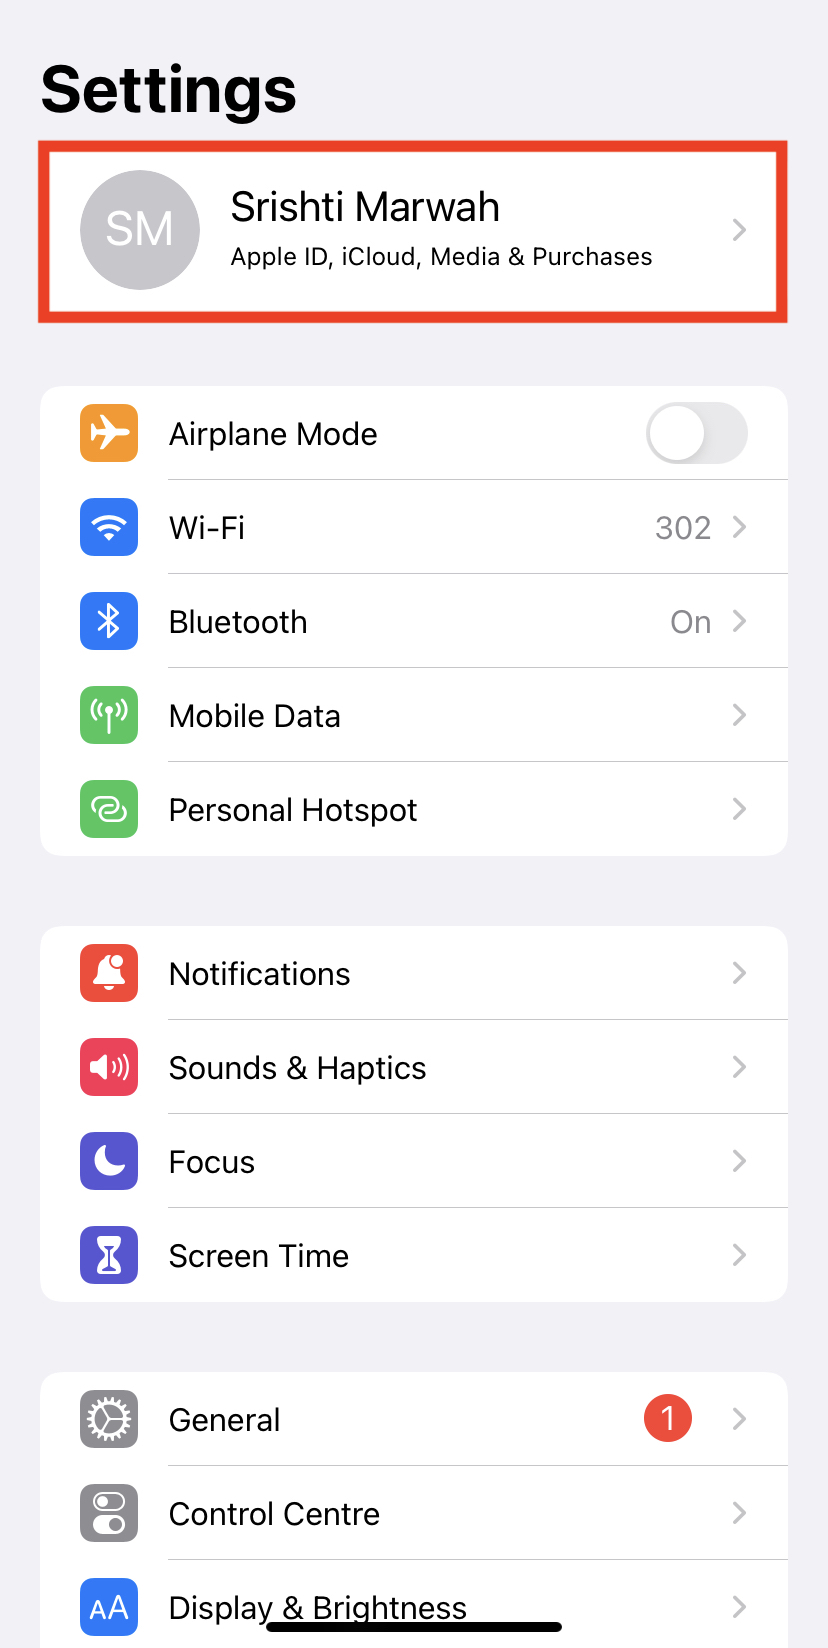
Step 3: You will now be able to see all your linked devices in this tab.
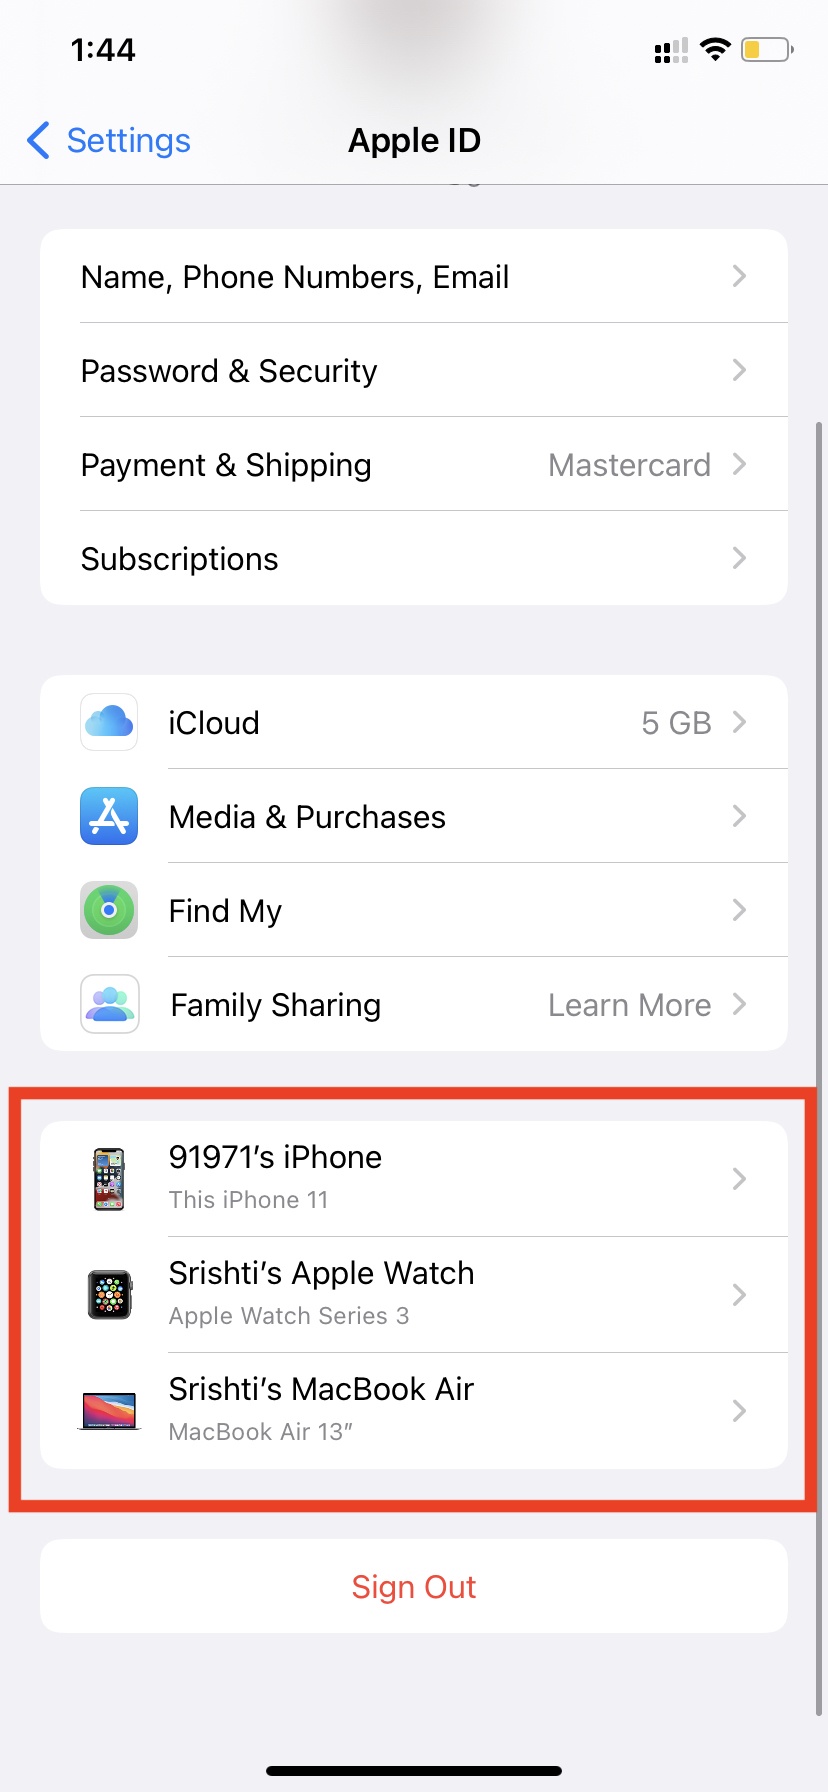
Step 4: Find the Safari Slider and take it to ON (to green colour)
Step 5: Now tap on Merge. Now all bookmarks in your devices are merged and are ready to be accessed on any device you need.
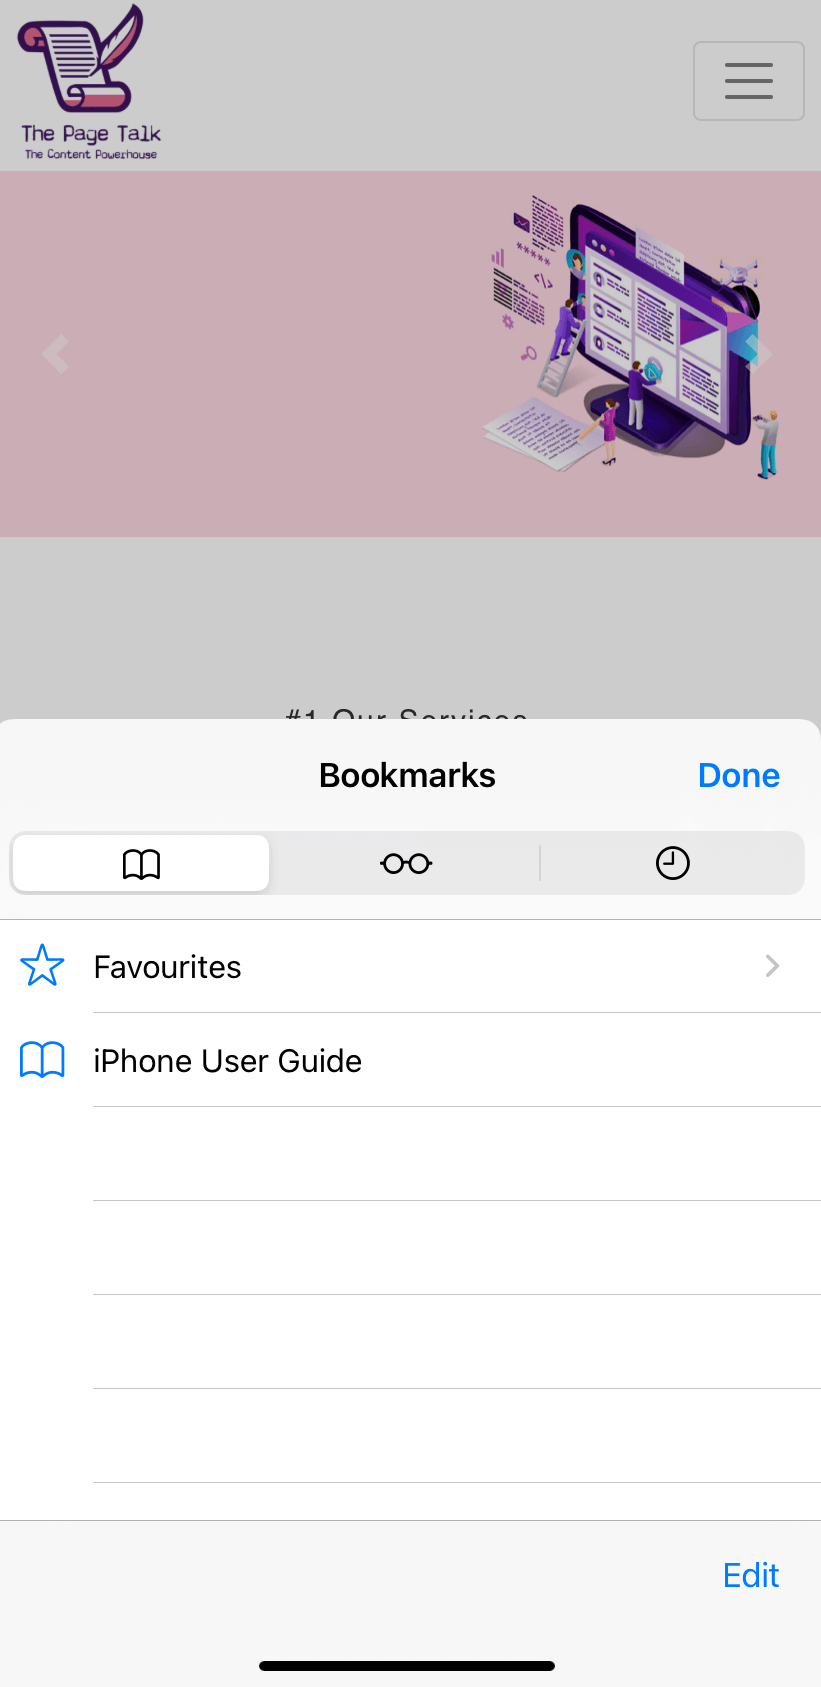
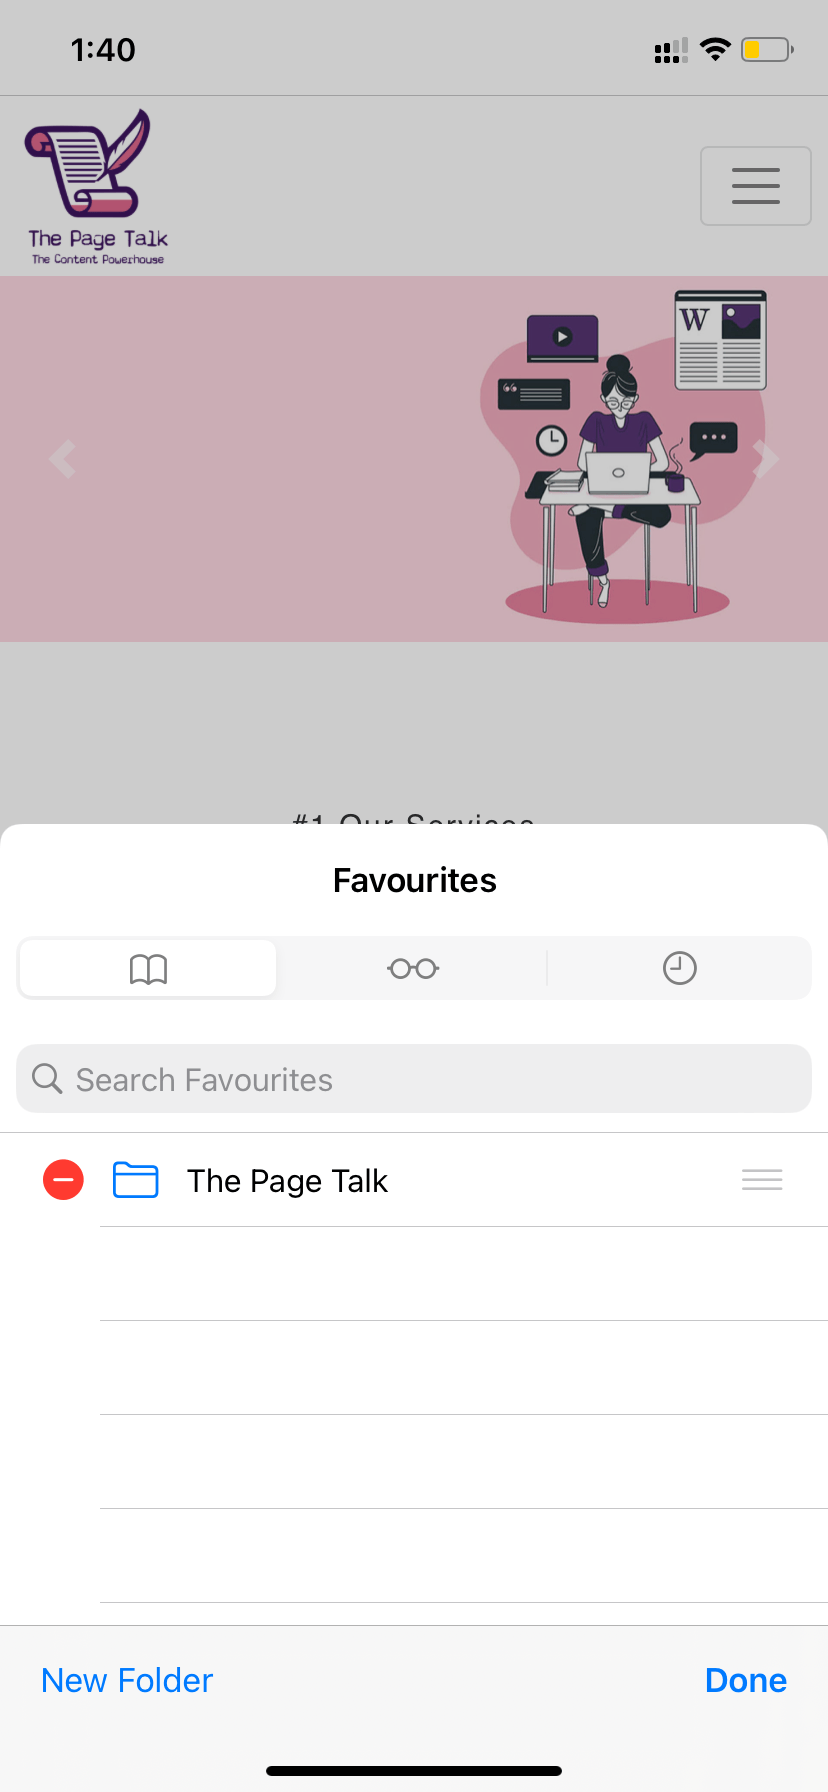
How To Manage Bookmarks In Safari On iPhone?
Now that we have looked into how to bookmark on iPhone, it can be equally obligatory to know how to manage and delete these bookmarks later when they are no longer needed. To address the same, we here elucidate the detailed steps to manage bookmarks in safari in iPhone:
Step 1: Navigate the open the safari app in your phone and tap on it to open.
Step 2: Go to the Open Book icon and tap on it to access the bookmarks you have.
Step 3: You can create a new folder by clicking on the New folder options available at the bottom of the screen.
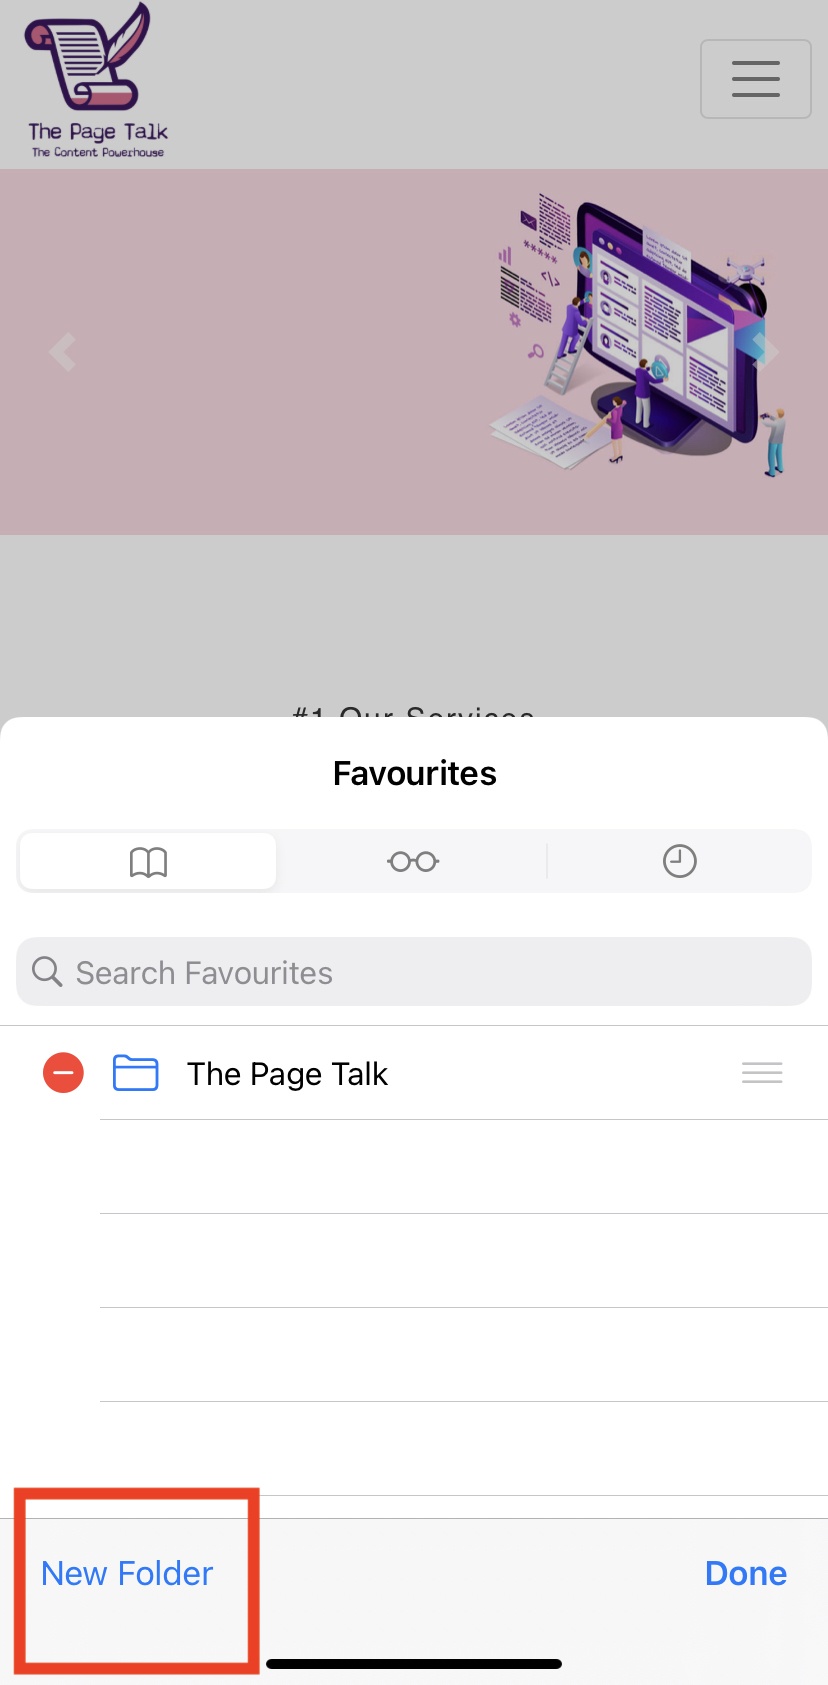
Step 4: You can reorder by dragging the bookmarks up and down. Further, you can remove them by taping the ‘-’ symbol. You can rename them too if needed.
Step 5: Once you have made necessary management, Tap on Done to confirm your changes applied
How to Add Bookmark to iPad?
The process of adding bookmarks to the Ipad is almost the same as that of an iPhone. On opening the Safari Browser, you can see the bookmark option at the top of the screen. Here is how you can add a bookmark to iPad:
Step 1: Navigate to the Safari app on your iPad and tap on it to open.
Step 2: Search and visit the webpage that you want to save as a bookmark.
Step 3: You can see the Bookmark option on the top of the screen (open book options). Tap on it
Step 4: Select Add Bookmark and then ensure you enter the right name and quotes if required.
Step 5: On the right-top side of the screen, find Save options and tap on them to confirm the changes.
Now you have successfully added a bookmark to your iPad. You can synchronise these bookmarks based on the above-mentioned steps.
Concluding Thoughts
Comprehending How to bookmark on iPhone, you might have understood that the process is simple and effortless. While it can be confusing for those who are new and are unaware of the process, it is facile for those who are aware of the same. Check out the steps above to see how this is done, and start saving your favourite site now.


Add Comment