How to Delete Screenshots on Mac?
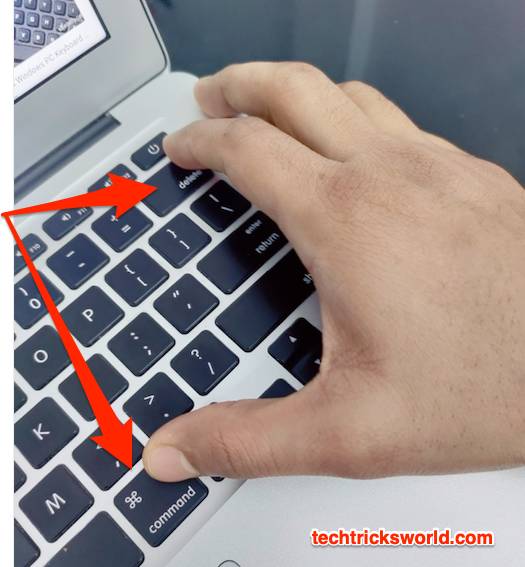
Select the file(s) you want to delete, then press Command + Delete keys to delete screenshots or any files from your Mac.
There are much more things about taking and deleting screenshots on Mac. I am going to explain everything in more detail. Please continue reading…
Taking a snap of the screen is called taking screenshots, and this comes in handy for different usages. Sometimes, just to remember something, we take screenshots, or sometimes, to guide someone, we do take screenshots. But, when you keep doing it, your computer is getting so many screenshots which are of no use later. So, in that case, you have to delete them. Talking about Mac laptops, generally, you have low storage if you take the entry-level Macbooks. So deleting unwanted screenshots can be the best choice. In this article, I am going to explain How to Delete Screenshots on Mac. Not just this, but we will discuss a bit more about it.
So, when so many screenshots are there on your Mac which are not useful anymore. It is a good choice to delete those screenshots to free the disk space. I have got this query on Quora, How to delete screenshots on MacBook Pro or How to delete screenshots on MacBook Air are, so let me tell you that on both types of Laptops, the method of deleting screenshots is the same. However, in this post, the screenshots are taken on Macbook Air.
How To Delete Screenshots On Mac (Macbook Air or Macbook Pro)
Ideally, any file, including a screenshot can be deleted by pressing the Command and Delete buttons on the keyboard together. Don’t forget to select the file(s) first before doing this operation.
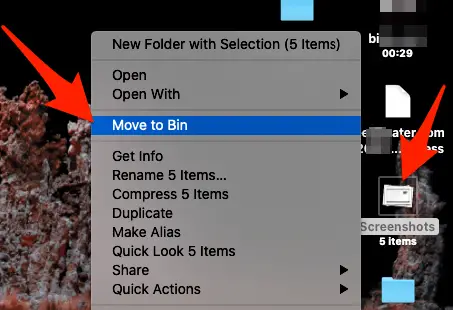
Also, one or more files can be deleted by clicking with two fingers on the Screenshot stack/folder or any single file or selecting many files then, click Move to Bin.
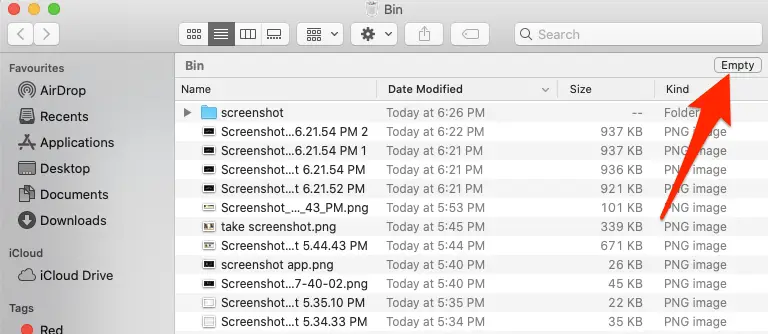
The last step is to go to the Bin, and Empty that.
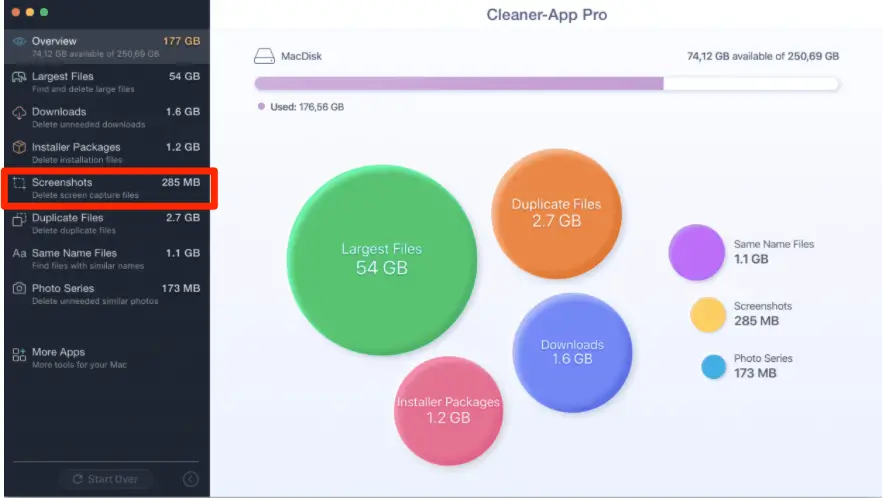
Each screenshot in Mac can take some space on your Mac’s storage. More pictures accumulated can take off gigs of memory. Thus these need to be cleared occasionally to save on space. Since you have stored screenshots in different locations, it can be time taking process to check all of them and delete them. In such cases, you can use a Cleaner app to make the task easy. By using the Cleaner app, it can find all the screenshots at once from all folders. So, you don’t need to find them manually.
- Step 1: If you don’t have the app, you can install it from the App Store. Once installed, Navigate to the Cleaner app and open it.
- Step 2: Go to and click on the Screenshots sections and Choose to select all.
- Step 3: Now, click on the Review and Remove button.
- Step 4: Choose those you want to keep if needed.
- Step 5: Click on Remove to delete the screenshots at a stretch.
- Step 6: Check out the trash bin and clear them over there too.
You have now successfully deleted all screenshots from your Macbook at once.
How To Take Screenshot On Mac?
How to Take Screenshots on Mac Using Shortcut Keys?
Taking a screenshot on a Mac is as effortless as that of windows. All you need to do is to implement three keys.
Step 1:Navigate to the site of the picture that you want to screenshot.
Step 2: Ensure the size for better inference of screenshot later
Step 3: Press SHIFT+COMMAND+3, and your screenshot is done.
As soon as you take a screenshot, a small box appears on the bottom right of the page.

You can check these screenshots on the desktop, making them easy to operate.
If you want a part of the screen and want to save time in cropping the screenshot later, you can use specialized screenshot apps. These are available in the latest mac versions like Mojave and Catalina.
- Shift + Command + 3 – Take a screenshot of the full Desktop screen.
- Shift + Command + 4 – Take a screenshot of a certain area of your Desktop screen.
- Shift + Command + 4 + Space – Take a screenshot of a certain window on the Desktop. Also, this shortcut can be used to take a website screenshot on your Mac.
How to Take Screenshots on Mac Using Screenshot App?
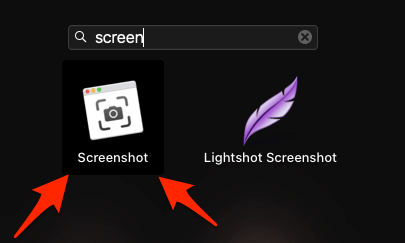
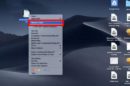
When you go to Launchpad on your Mac, and type Screenshot, you will see the icon shown in the below screenshot for the Screenshot app. Click to Launch it.
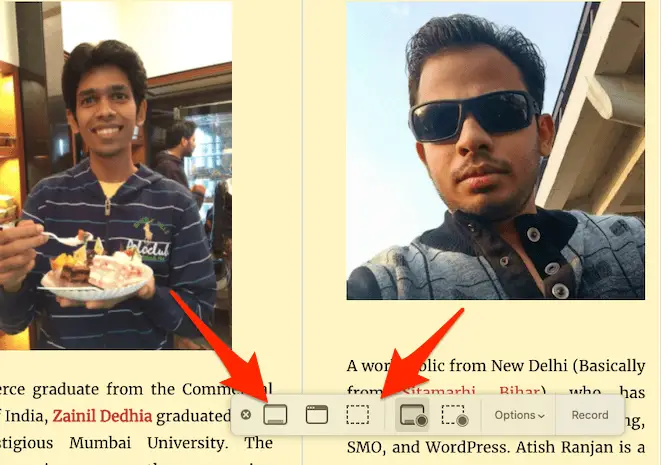
When you launch it, it will show you various options at the bottom of your screen, and you can use the options to take screenshots of full screen or certain parts, or even you can record the screen as well.
Although just moving your cursor on each of them would tell you what each can do, I am going to explain about them here too.
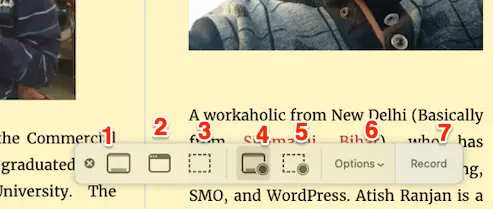
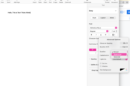
I have numbered 1 to 7 to each option, now, I will share what each do.
- This option captures the Entire screen.
- This option Captures the Selected Window
- This option captures the selected area.
- This option video records the Entire Screen.
- This option video record the selected area.
- This option will show more options.
- This option just start recording everything.
How To Remove Screenshots From Mac Desktop Without Deleting?
When you take screenshots by pressing command+shift+3, they are saved on Desktop, and your desktop looks cluttered when so many screenshots are saved, so you can do one thing, make screenshots named folder and move all of them in that. In that case, they are not deleted but your desktop is cleaned. Now, what? Again you will take screenshots and again they will be on the desktop. That will be cumbersome to copy paste them into the folder. So, what we will do is, we can just change the screenshot saving place to that folder. For that:
- Step 1: Make a folder on the desktop named Screenshots; this is the place where you can save and access all the screenshots.
- Step 2: Right-click on that folder to get access to a set of options.
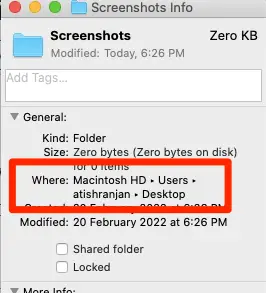
- Step 3: Choose Get Info.
- Step 4: Find the “Where” information in the new tab that opens.
- Step 5: Copy the information into the Notes app on your device; we will use it later here.
- Step 6: Press COMMAND+ SPACE and type terminal, hit enter to open the terminal app.
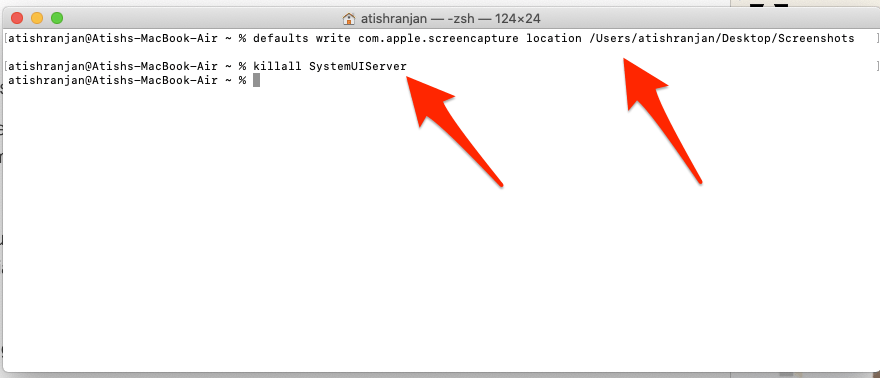
- Step 7: In the new window that appears, enter defaults write com.apple.screencapture location.
- Step 8: Open the notes where you saved ‘where” information and copy that.
- Step 9: Paste the copied text after the code was previously written. [make sure after Location give a space then paste the path]
- Step 10: Type “/Screenshots” after the code and then press enter.
Note: You can also just drag that folder to the Terminal, it will automatically take the path of that folder there. (If you this way, this will include the steps 8,9,10 at once)
- Step 11: Enter “killall SystemUIServer” and press enter again {This is done to make sure that changes you have done take place}
So, now, just copy-paste older screenshots from the desktop to that folder. New screenshots when captured will be autosaved in that folder because what we did here is just changed the storage location for the screenshots.
Conclusion
Here You go! You now know How to screenshot on Mac, and also How to remove screenshots from Mac desktop without deleting them. Deleting is effortless; however, it is almost impossible to retain them. Thus, removing them from the desktop without deleting them is a better option. Nonetheless, we have elucidated detailed steps for both the processes for you to choose one from as per your choice.


Add Comment