Current generation life is driven by technology. Every day we hear about amazing techs and gadgets that make our lives simpler. Smartphones are the great examples of it. Smartphone camera changed the way how we used to click photos. Though smartphone cameras are used widely, there are different DSLR and other cameras out that are being used for professional use. GoPro is one such professional camera that is well known for its wide-angle capturing ability. This is the small camera to capture the best quality of point and shoots.
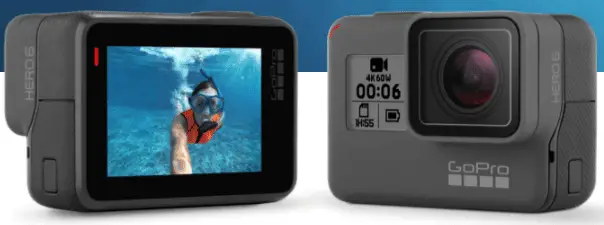
Nick Woodman, the CEO of GoPro invented the GoPro camera to capture his own photos while surfing. This camera is best suited to travellers, hikers, and bikers because its size is compact and looks like a small cuboidal. You can attach it to your bike or cycle or even Drone. Moreover, If you’re searching for some high-quality travel camera, our friends at Globo Surf have some great guides that could help you choose the best.
What is GoPro Fisheye?
The GoPro Fisheye effect is a circular distortion around the peripheral of the photo. The lens of this camera itself creates the effect. The GoPro camera is designed in a way that it captures as much as possible of the front of the camera. This is done because the lens edges distort the light coming into it that results in bending the light and projecting to the sensor which in turn creates a circular distortion around the peripheral of the photos. The GoPro Fisheye effect is very useful for capturing sporting photos such as rafting, hiking, skiing etc. where the person stays in the centre.
How to Remove Fisheye from GoPro Studio?
Since the fisheye effect gives a circular distortion look, you can use any image editing software to remove that distortion simply by stretching the image from all sides, but that is not the professional way because it might make the image look bad sometimes when you do manually. But, there is no need to worry because GoPro has its own software for such editing known as GoPro Studio. You can download it from this page. Once downloaded, install on your PC.
You will be asked to install QuickTime if you haven’t had it already on your PC. This will offer you to download it by giving you the download link.
Once both GoPro Studio and QuickTime are downloaded, launch GoPro Studio now and follow the steps below:
- Select import & convert option
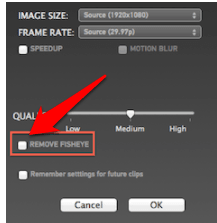
- Under Advanced Settings, select Remove Fisheye.
- Now, add the photo with GoPro fisheye effect to the Conversion List. In some time it will be converted, and you will be prompted that it is done.
GoPro studio also stretches the image to remove the fisheye, but it does better than what you do using other editors manually. While removing the GoPro Fisheye, you will lose some parts of the image as they are stretched and cropped.
Moreover, you can also remove fisheye by default by changing the FOV (Field of view) on the GoPro camera.
Now, you know what is GoPro, What is GoPro Fisheye Effect, and how to remove Fisheye effect from GoPro. Now, as a bonus, I would like to show you how you can create a fisheye effect in PhotoShop.
This can be great if you don’t have GoPro or similar camera that supports Fisheye effect. You can use Photoshop to create this effect on any image you want in just a few steps.
How to Create Fisheye effect in Photoshop?
Step 1: Launch Photoshop.
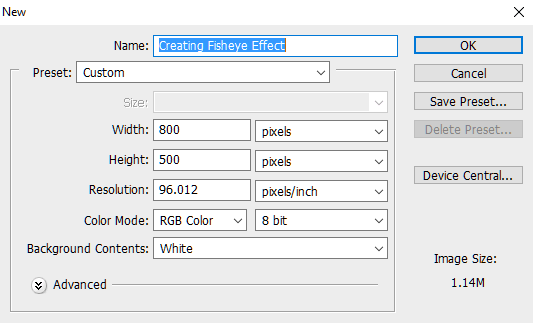
Step 2: Go to File >> New, and take any dimension you want. I am taking 800 x 500.
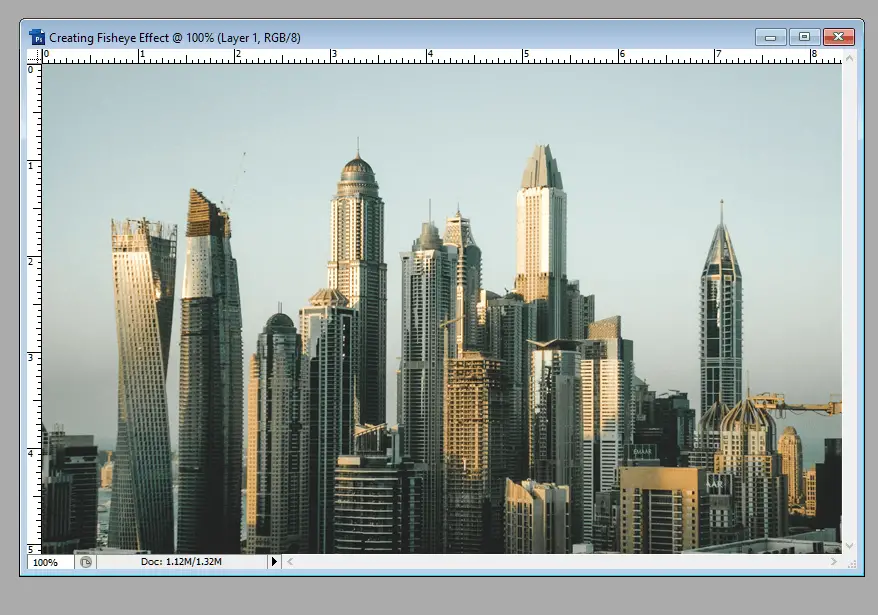
Step 3: Click OK. You will see a new file there. Now, open any image in the Photoshop and drag that into this new file that is created. I am repeating that you can choose any dimension or you can set it as per the image you are going to use. For now, I am just copying an image from the internet, and pasting in the file.
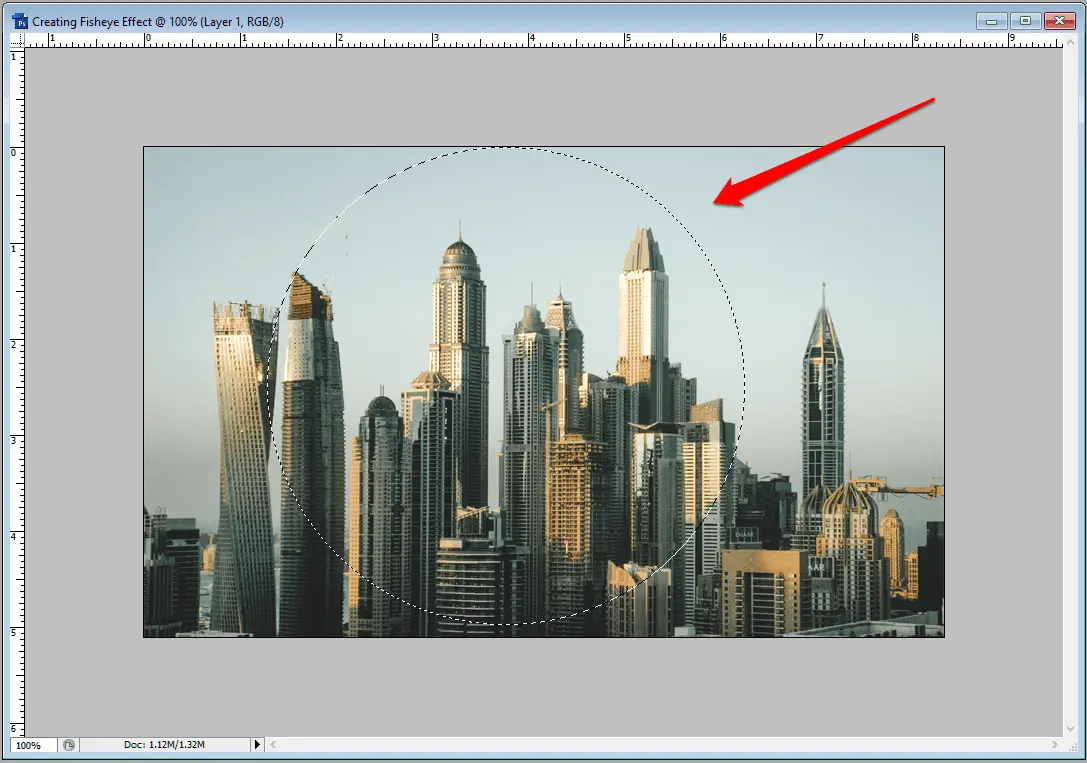
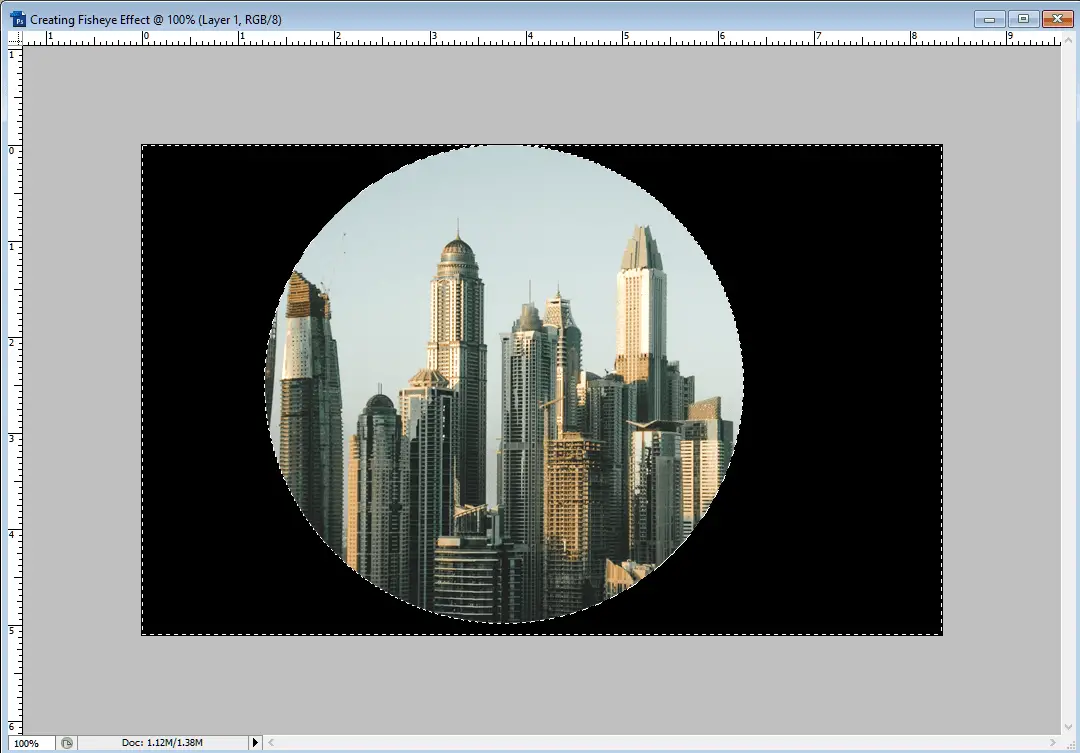
Step 4: Select Elliptical Marquee.
Step 5: Hold the shift key, and using the Elliptical Marquee tool, draw a big selection as you can see how I did in the screenshot below:
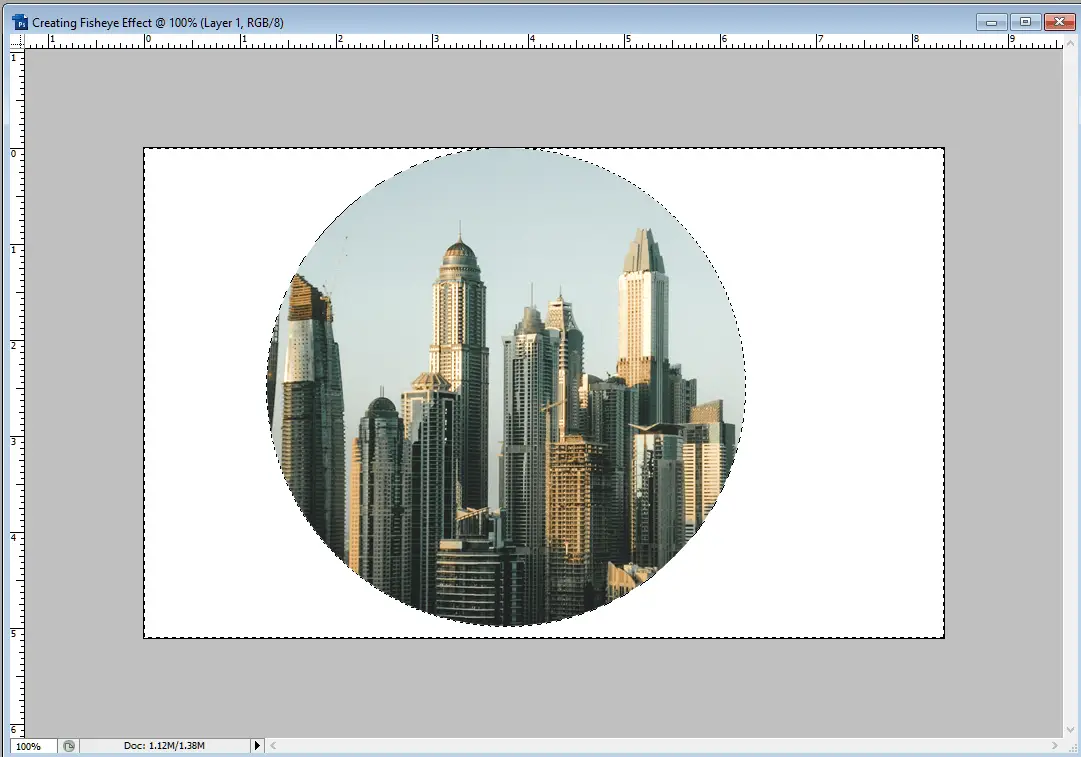
Step 6: Now, go to Select >> Inverse.
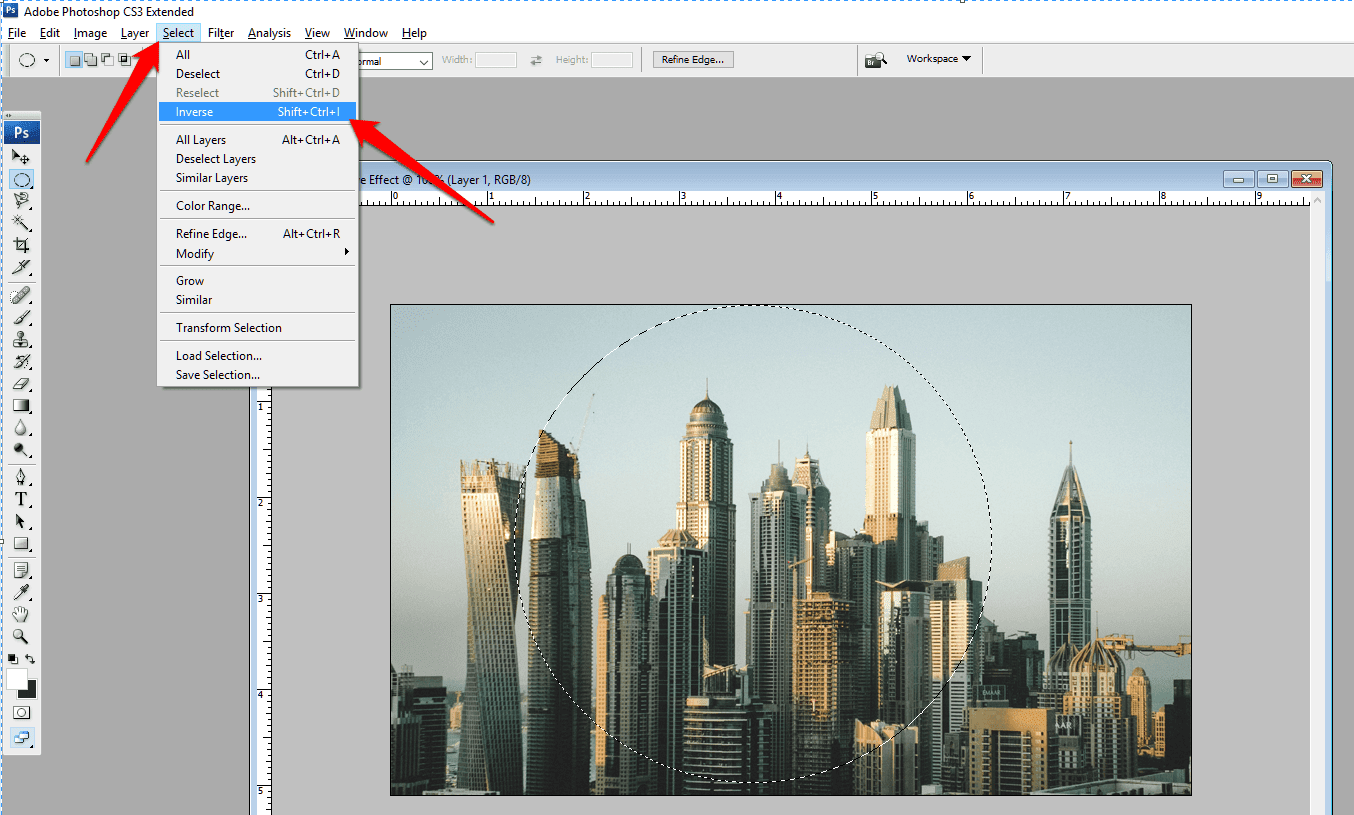
And Press Delete button on your Keyboard which will remove the extra part of the image.
Step 7: Now, make sure the Foreground colour is set to black. If not, then do it.
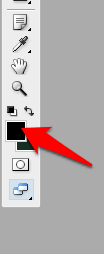
Step8: Use Paint Bucket, and fill the colour to the image’s white part.
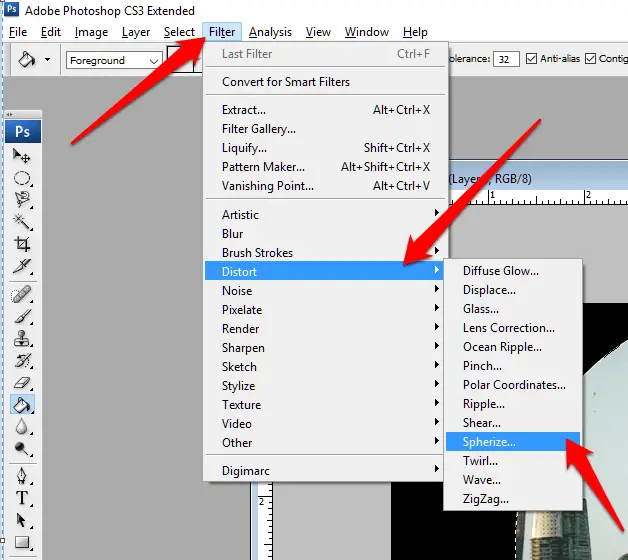
Step 9: Now, once more do, Select >> Inverse. Then go to Filter >> Distortion >> Spherize.
And, you will see this:
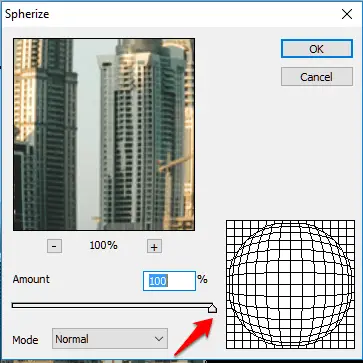
Keep the Amount at 100%, and click OK.
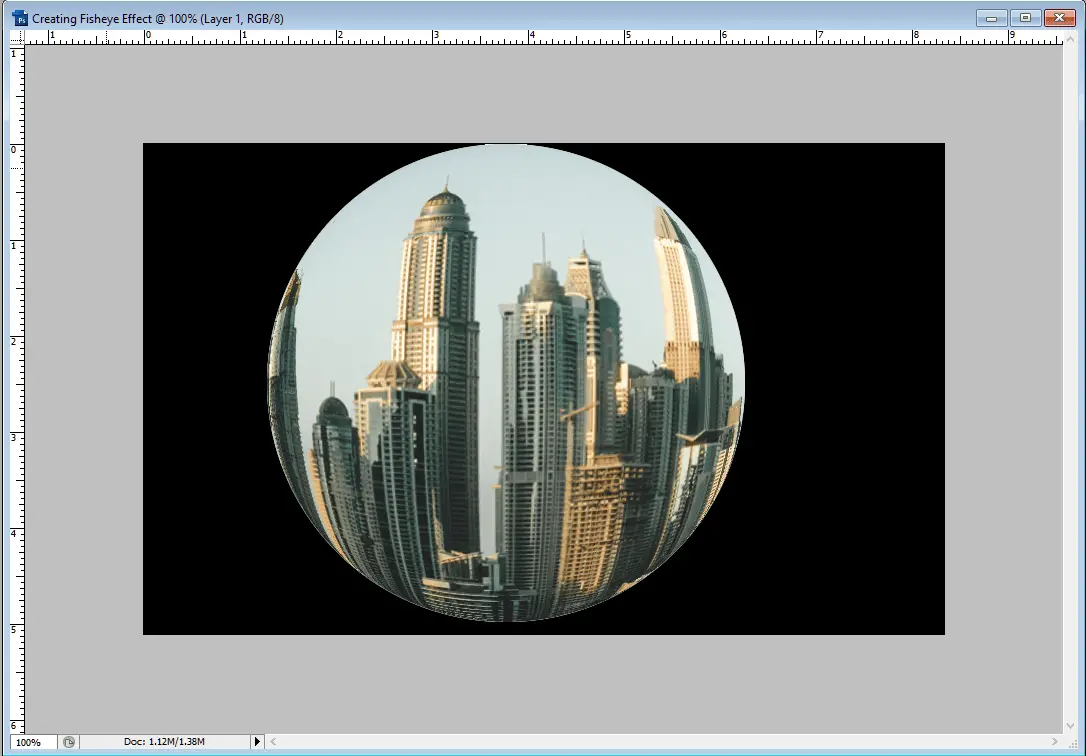
Step 10: Now, you can make use of Crop tool to cut extra Black parts, and you will see the image like this:
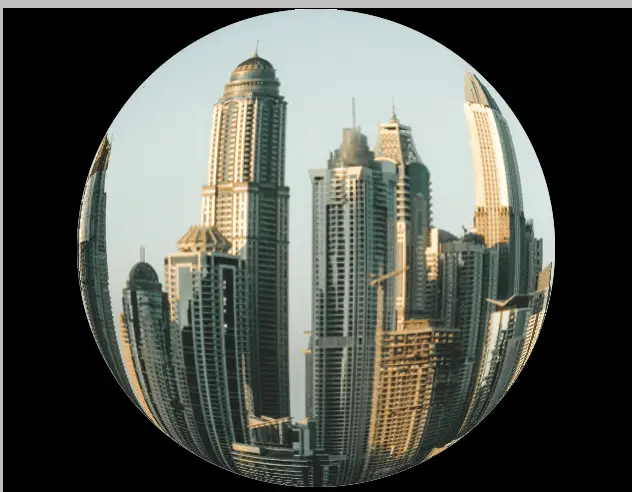
You can now save the image on your PC, and view it in any image viewer as well.
Isn’t the whole process very simple?
So, this is how you can create a Fisheye effect in Photoshop in simple steps.
Conclusion
GoPro camera is great for capturing pictures with fisheye effect, and that is why people popularly term this effect as GoPro fisheye effect. But, you can do this even you don’t have GoPro camera because Photoshop is capable of doing this without much hassle. If you are one who loves photos having a fisheye effect, then just launch Photoshop, on your PC, and start giving this effect to your photos following this tutorial.
Please share your views in the comments. Also, I would request you to share the post if you like it.


Hi,
This is nice post for remove fisheye from here and great to see you here . thanks a lot for it
Fisheye shots are the best! Especially in travel photos. Thanks for sharing your tips 🙂 Photos would be great! Cheers!