Have you ever had this error? “Windows was unable to get a list of devices from windows update”. If you have then you might have been dejected once you suffered due to this small glitch. This problem temporarily occurs and plagues PCs when the additional input device is not recognized by the current version of Windows installed on your PC. However, there are solutions to this problem and I will discuss them briefly in this article:
Methods to Fix the Error “Windows Was Unable to Get a List of Devices from Windows update”
Problem related to Windows Updates
Windows Was Unable to Get a List of Devices from Windows update error may appear if the Windows updates have not been installed properly. So, you may try fixing this error by properly installing the updates.
For checking it, you can do this:
- In the search bar type in windows update.
- From the Cortana window, the windows update icon will appear as a search result.
- Click on the update icon to open the window, you will find an option called to check for updates, click on the option.
- Wait for some time as the results come in. Once you find out if there is any pending update remaining, resume downloading them.
- After installing the updates, you will be required to restart your PC so that the installation can happen before startup.
Try Deleting the Software Distribution Folder
The other way in which this problem can be tackled is to delete the software distribution folder. Here are the steps that can be done to delete it:
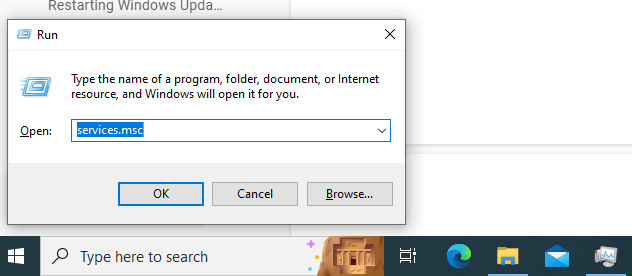
- You start the process of deletion by opening the run window. There are two ways to open a run window. One is the usual typing run in the search bar and selecting the run icon at the Cortana window. The other option is to press the ‘windows key’ + ‘R’ simultaneously.
- Now in the run window, type in ‘services.msc’.
- As the services window opens, look for an option called ‘windows update’.
- Once you open the window, first tap on ‘stop’.
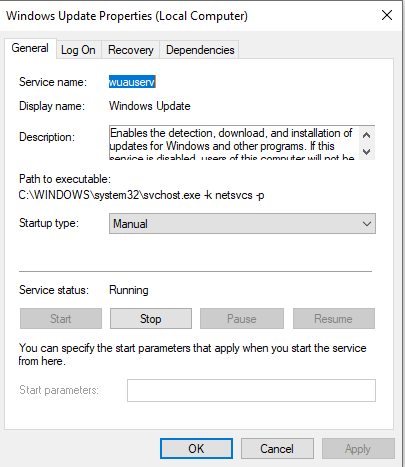
- After that click on ‘apply’ and then ‘okay’.
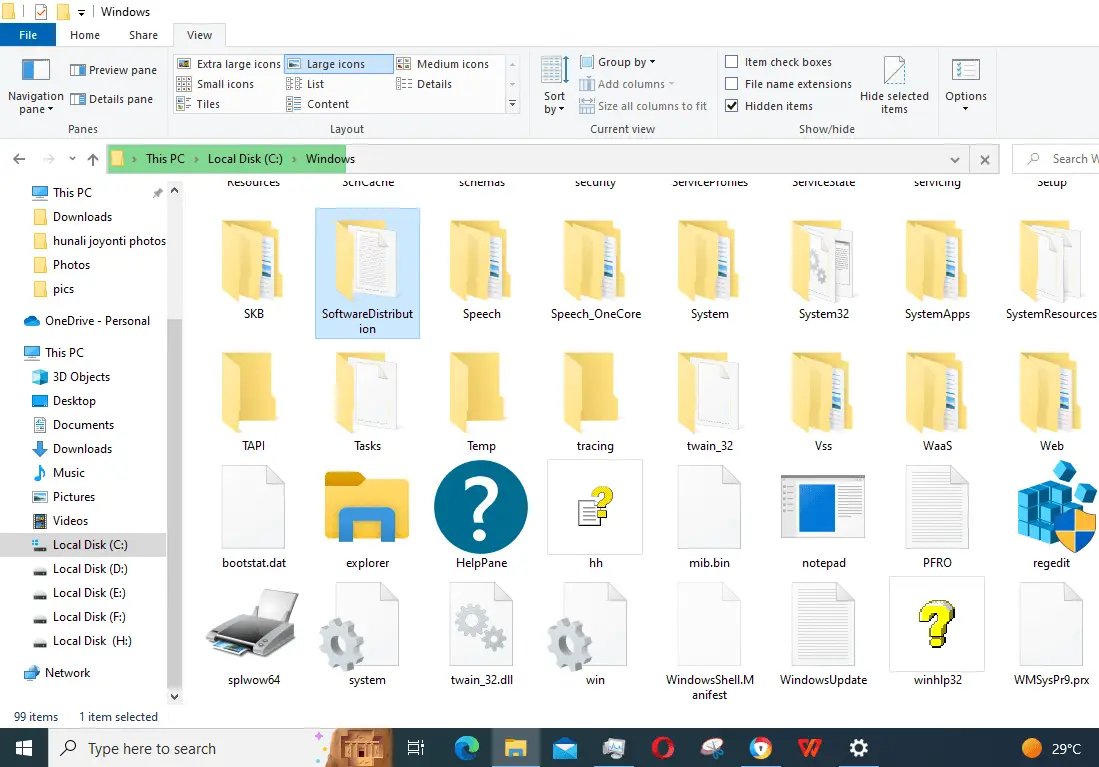
- Now move on to File explorer, or use a shortcut like ‘windows key’ + ‘E key’.
- Now open your C: and then delete the Software Distribution Folder.
- Come back to the services page, you will have to click on ‘Windows Update’ again and then click on ‘start’, then ‘apply’, and then click on ‘Okay’.
Change the title of the ‘software distribution’ folder and reset the Catroot2 folder
You might be shocked to know but the trick works and has provided favorable results. You can try it. And it does not hamper the essential prerequisite system settings. The steps will encompass changing names and resetting the catroot2 folder, Here are its steps:
Renaming the ‘software distribution folder’ through CMD
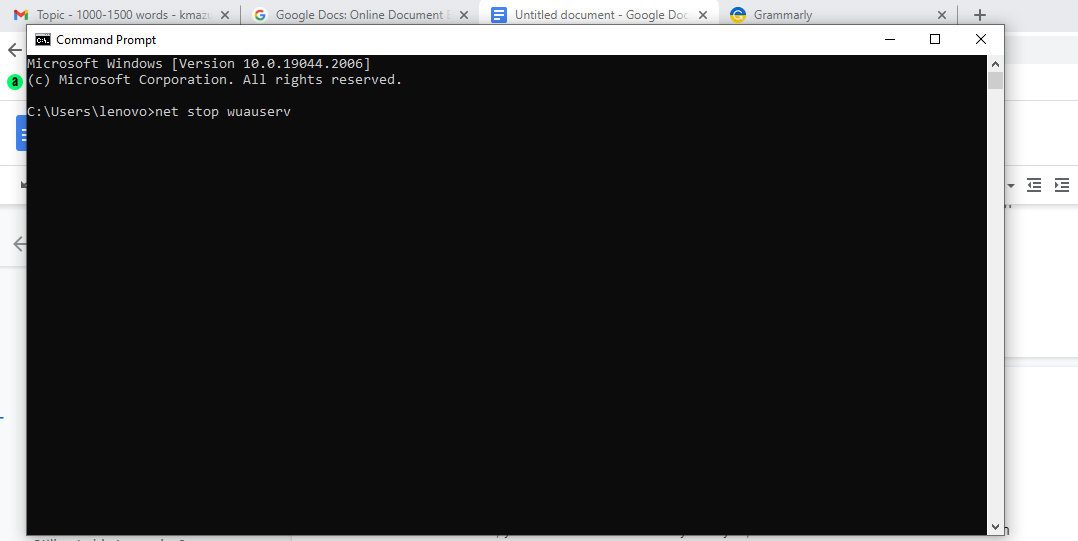
- You have to start by renaming your folder and resetting your catroot2 folder. Open run on your PC.
- For shortcuts, you can use the ‘windows’ + ‘X’ key.
- Select CMD (Command Prompt) from the list of available options and open it.
- Now you have to key in,’ ‘net stop wuauserv’, and then press enter.
- Then again key in, ‘net stop bits’ and then press enter.
- After that, you should make sure that you key in, ‘rename c:windowsSoftwareDistribution SoftwareDistribution.bak’ and then press enter.
Restarting Windows Update through CMD
- To restart your windows update key in, ‘net start wuauserv’ and then press enter.
- Now then again key in ‘net start bits’ press enter and then type in another command, ‘net stop cryptsvc’, and then press enter.
Resetting the Catroot file in your PC
- Before the computer proceeds for a restart session, you have to key in Catroot 2 resetting commands and here it is, ‘md %systemroot%system32catroot2.old’.
- Then key in another set of commands, ‘xcopy %systemroot%system32catroot2 %systemroot%system32catroot2.old’.
- Press enter in both these commands.
- Once the commands are properly executed now you can open your C:
- There you can access the Windows and system 32 folders.
- Once you access them you will find the Catroot folder as well, make sure to delete it. Wait for some time till the problem gets resolved.
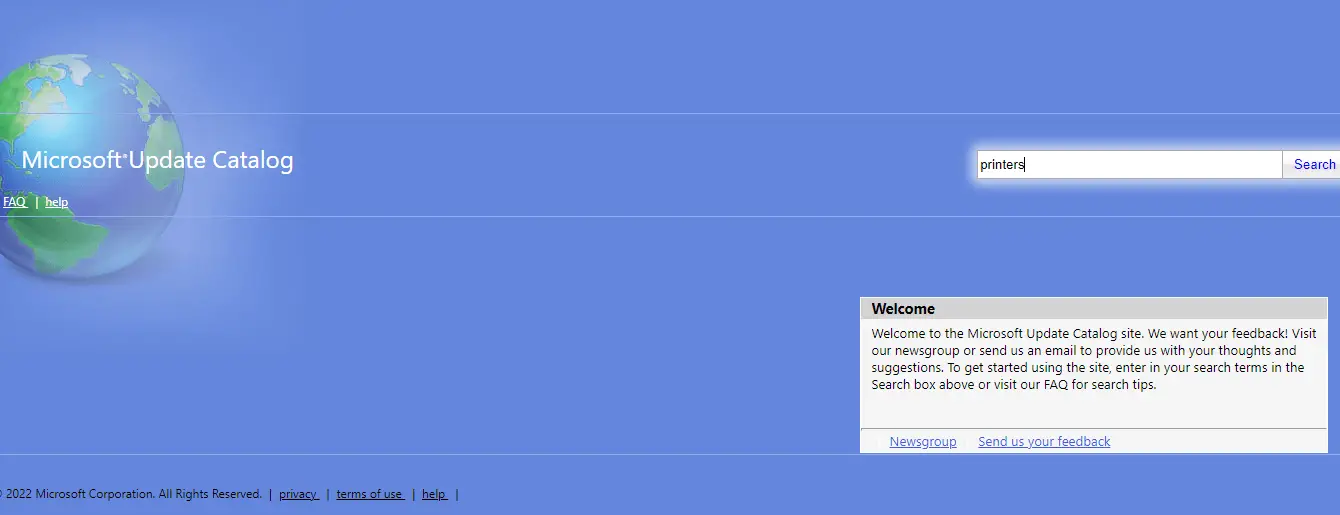
Try downloading updates manually
- You have to visit this website, http://catalog.update.microsoft.com.
- In the search bar, type in your printer name and search for driver support.
- There will be two tabs and the items will be sorted based on products and descriptions.
- You have to select the ones that you want.
- You have to click on ‘add’ to add the product to your cart.
- Once the item lands in your cart you can download the components, just simply download all the files.
- Remember the location that you have used for the components to be placed on your PC.
- Use Driver.CAB to run the driver extraction process.
- Once it’s done place them in your desired drive, mainly system drive, or C: is a much better choice.
Still Not Able to Resolve?
As compared to other fixes, the PC repair tool is the easiest of all fixes, we have so many in the market. I would recommend using repair tools like Rosario PC Repair Tool, IO Bit Driver Booster, AVG Cleaner, Fixwin, etc. Use any of them and look for any errors that have been preventing the integration of the software file with the hardware attached through your PC as an input device.
If none of these nuanced methods work. You can always run a virus check with an offline scan through Windows Defender to check if the attempts of curbing installation are being made by a third party and it’s recommended to do an offline scan which is also the ‘boot scan’.
You can also use antivirus software and run a boot time scan so that the infiltration can be located that is performed by malicious software, virus, spyware, or malware and curbed right at that moment. In case you do not want to run a boot you can also try to wipe it out by running the antivirus through safe mode.
The best part about these particular fixes is that all these issues with updates may have been caused by one particular error or some files and documents getting corrupted. While running an overall scan fixes these issues from the root, and repairs the inconsistencies letting the problem escape once and for all.
If all of these steps prove unfruitful, then do a PC Reset, without deleting the files. All these options can be performed as per your priority.
Conclusion
Treating issues where errors occur without providing a context to the problem can be intense. Which input device is your PC not able to integrate into its system because of software limitations? But in this case, it’s mainly the Printers that provide a hindrance. Go through these hacks and see which one works out for you. I loved the ‘CMD’ hack since this is the most reliable and effective method in flushing out all altercations in your input device installation.


Add Comment