How to Fix the Error Server DNS Address Could Not Be Found on Android?
Recently, I have written an article about the fix of the error “Unable to resolve the server DNS address” in which I have explained how you can find and fix the DNS related issues on your computer, and get rid of the problem.
The same issues people face on their Android phones as well where they are either have no access to the internet or they face issues while accessing a few websites.
Here again, first, do check if the internet is working or not. If the internet is not working as a whole then it might be a case that you should escalate the issue to your ISP but if the internet access is there and still you are not able to access some of the websites that are opening on others’ phones/computers but not working on yours, then that may be the case of DNS address.
While accessing the sites, you may see the error “Server DNS Address Could not be found”.
So, in this post, I am going to explain how to fix the issue on Android.
How to Fix the “Server DNS Address Could Not Be Found” on Android?
-
Enable/Disable the internet
If your Android phone is connected to the router, then turn off the router, and then turn it on after 10 seconds. If your phone is using Mobile data, try disconnecting and connecting. Sometimes these easy things may fix the issue effectively.
If not, move to the next fix.
-
Use Google DNS Server
In this, you have to find out the phone’s internet setting and update the DNS server to Google’s free DNS. This is one of the most effective tricks if there are DNS related issues as Google’s DNS works fine in most cases. Read more about free public DNS servers.
How to do it?
Different phone models have different ways to do it. I am doing it in Vivo V11
Below are the steps:
- Swipe up from the bottom, and you will see the Wifi icon there.
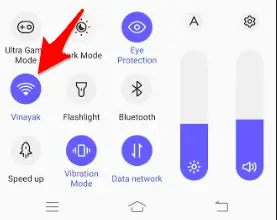
- Now, tap, and hold on Wifi icon. This will take you the wifi properties.
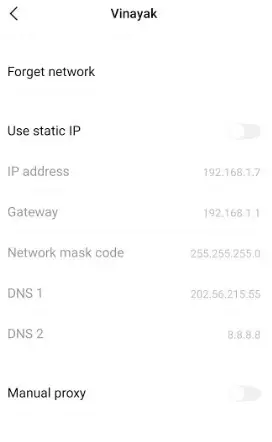
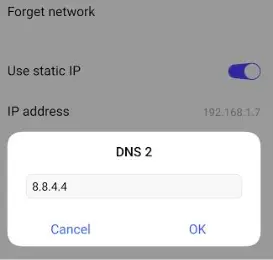
- Now, if your phone is not using static IP, then tap the option to turn it on, and then, tap DNS 1, and enter Google’s DNS 8.8.8.8. Then again tap DNS2, and enter 8.8.4.4.
That is all. The DNS is updated. Now, do try to check out the website that was not opening only on your phone. That would work for sure now.
-
Restart Your Android Device
Restarting your phone may fix the issue at times as when you restart a computerized device such as your phone, it gets refreshed. That works in multiple cases. So, when you are getting this DNS error issue, do try to restart and see if this works for you.
-
Update Google Play Services
There are many apps out there on your Android device that need Google play services in order to work normally. So, if you are facing issues like this or something like “dns_probe_finished_no_internet”, then do update Google Play Services, and it most likely will fix the issue.
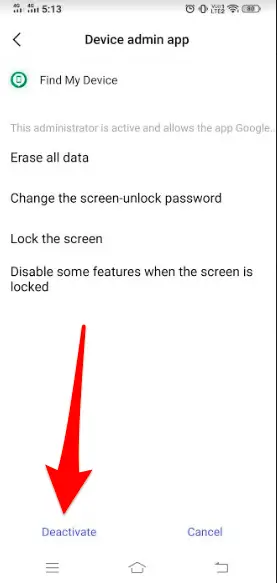
To make any changes to Google Play Services, first of all, you have to deactivate the Android Device Manager.
In Vivo V11,
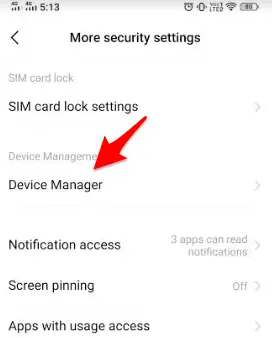
Go to Settings >> Security/Privacy >> More Security settings >> Device Manager.
There you will see “Find my device”. Tap on that, and then on next screen tap “Deactivate”.
Now, again go back to Settings >> More Settings >> App Manager.
Look for Google Play Services. Now, tap on that.
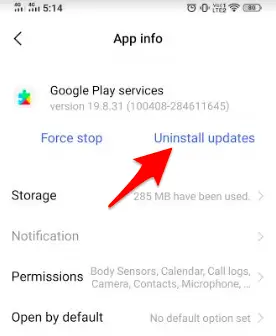
Now tap “Uninstall updates”
Now, go back, and repeat the process to reactivate Device Manager.
Conclusion
So, when you are getting error “Server dns address could not be found” on Android, then try these fixes, and I am sure you will be able to fix the issue in no time. If you have any questions, do write in the comments, I will get back to you soon on this.


Add Comment