If you have been using Windows or for that matter any PC with any operating system, you should be aware of one of the common terms thrown around quite frequently, Hardware Acceleration. Like most of us dealing with the computers, you may have heard about it, but do not know how to work with it or how to enable/ disable it. That is one of the reasons we tried understanding the concept ourselves and then provide you with complete information on how to deal with it.
What is Hardware Acceleration?
Before we can understand how to turn off hardware acceleration on Windows 10, it may be quite practical to get a thorough knowledge of what exactly the term means. So, we would make an attempt at understanding what is Hardware Acceleration on Windows 10 (or any other operating system as such).
Simply put, hardware acceleration refers to the use of computer hardware for completing some of the tasks. That would mean, your software will be aided by the hardware in handling a few of the tasks. When you request a task from your PC, it will typically be rendered by the standard CPU ability of your computer. However, when the task is more demanding, you will end up getting an affected performance. With hardware acceleration enabled, the task does use the dedicated components of your computer so that it would be able to perform the task rather efficiently and faster enough.
A few components that can take part in this hardware acceleration would include your sound and video cards. This can be one of the excellent means to improve your performance. Since computers today are made available with dedicated GPUs, hardware acceleration can be one of the excellent options for your high-definition games, and resource-intensive video editing tasks. It also helps when extensive printing tasks need to be done through multiple printers.
Browsers like Chrome also force your PC to run in the hardware acceleration mode when it needs to display elements in high definition.
How to Turn off Hardware Acceleration on Windows 10?
Well, from what we have learned from the above discussion, it should be evident that hardware acceleration can be one of the best options that you need to keep enabled. Of course, a host of computers today come with hardware acceleration enabled.
However, there are a few situations where you would need to disable or turn off hardware acceleration. Maybe your CPU can handle the demanding tasks all by itself. That would render the hardware acceleration option useless. Or perhaps you are facing a few performance issues due to hardware acceleration and want to turn it off. Whatever be the reason, Windows 10 lets you turn off hardware acceleration. If you are on Windows 10 version 1803 or higher, you can easily do it.
Here is how to turn off hardware acceleration on Windows 10 devices:
Method 1
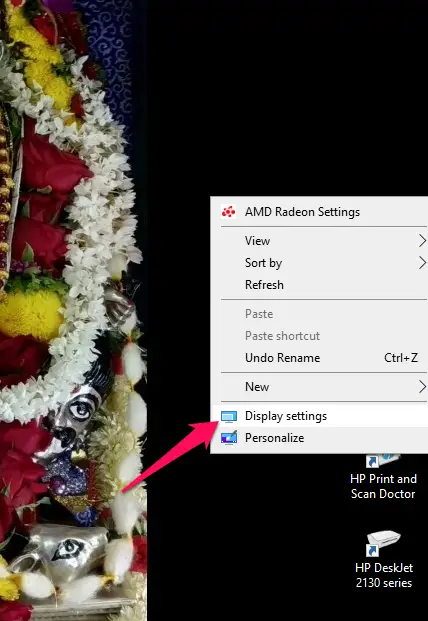
- Right-click on any empty space on your desktop.
- From the context menu, click on Display Settings.
- Scroll down and locate Advanced Display Settings.
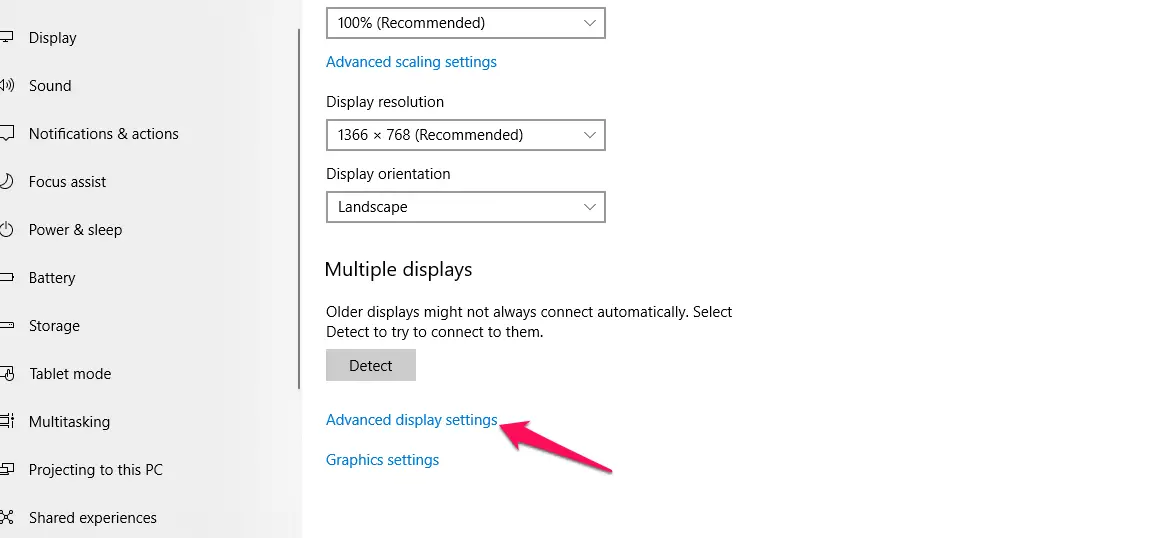
- Launch the Advanced Display Settings
- Locate Display adapter properties for display 1 on the next screen and click on it.
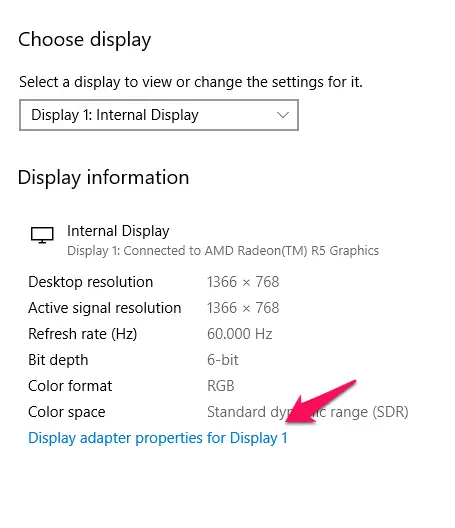
- This should launch the properties window for your Display.
- Choose the tab that says Troubleshoot
- Click on Change Settings
- You should now find Display Adapter Troubleshooter
- Locate Hardware Acceleration here and turn it off.
That does it. You have successfully turned off Hardware acceleration on your computer.
Please note the option for hardware acceleration option may not be available on every PC. If it is NOT available on your device, you will end up knowing that the functionality is not supported on your PC.
Method 2
That was all about how to turn off hardware acceleration on Windows 10 using the computer settings. However, if you do not find the option, or the option is greyed out for you, you may need to use the registry editor to disable hardware acceleration.
The steps to disable hardware acceleration using Windows 10 registry would be a little complicated and risky if you are not aware of how to handle it. A wrong step can render your system useless and non-working.
Here are the steps to disable hardware acceleration through Windows 10 registry:
- Launch your registry editor. You can do this by using the RUN dialog box and then typing in regedit. You can also search for registry editor through your Windows Search option.
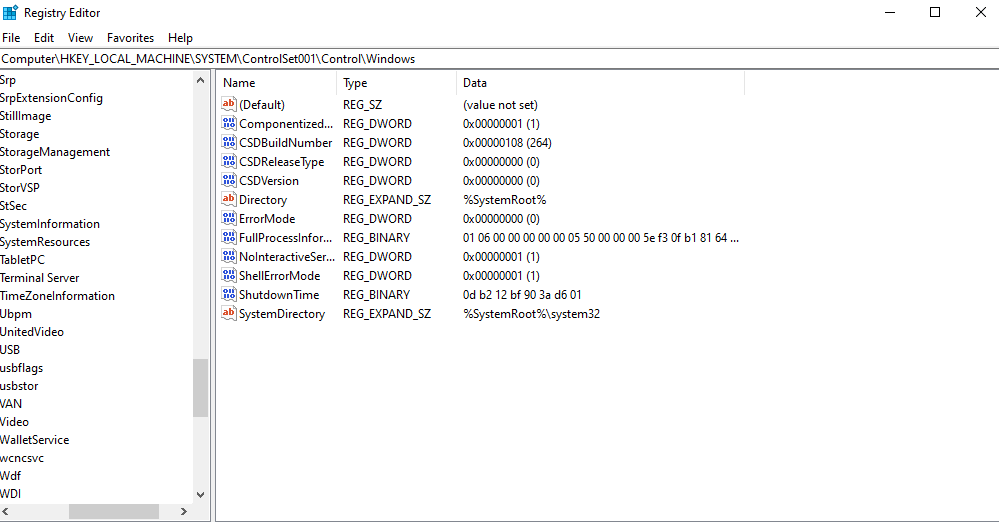
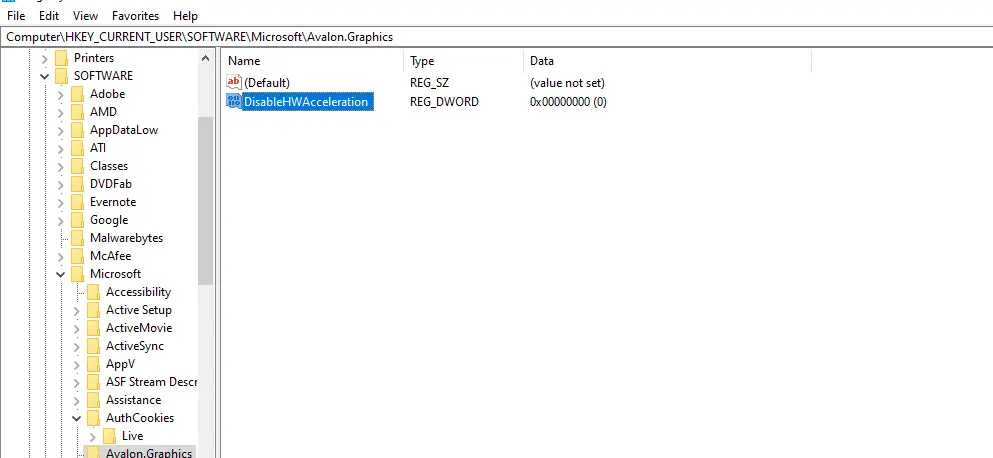
- Follow the path HKEY_CURRENT_USER\SOFTWARE\Microsoft

- Locate the option for your graphics card. In our case, it was marked Avalon.Graphics
- Click on this entry
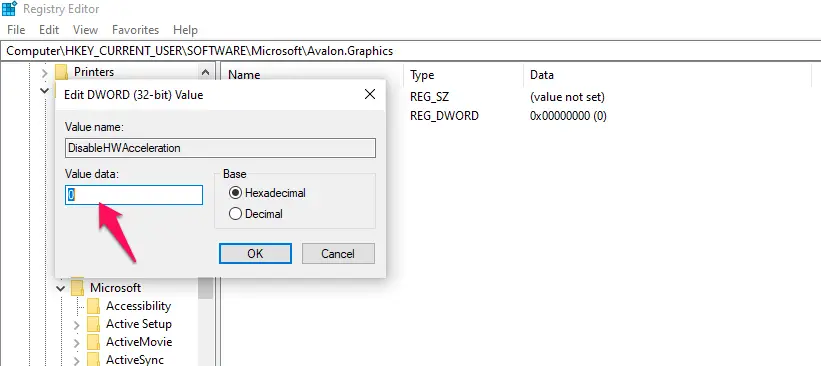
- Locate the entry DisableHWAcceleration. If it does not exist, create one. You can do so by right-clicking on the right pane and choosing the option DWord. Name it as DisableHWAcceleration
- Change the value to 1. You can do this by clicking on the DWORD you just created and entering the value of 1. A value of 0 enables hardware acceleration.
Well, that was how you could disable hardware acceleration using Windows 10 registry. Please note that functionality will work only if your hardware supports it.
Take extreme care when editing your system registry. If you end up doing something wrong, you would need to opt for professional assistance for addressing the concerns thereafter. If you are unaware of what you are doing, never edit the registry settings.
There are times when both the methods may fail to help you disable hardware acceleration. This can ideally happen when the drivers for your graphic card are not updated or corrupted. You can update the drivers by either visiting the manufacturer’s website or updating the drivers from the Device Manager option.
The Concluding Thoughts
Well, if you are looking for the best options on how to turn off hardware acceleration on Windows 10, the two primary methods should help you get access to the best possible resolutions. Check out those steps and share your experiences with us.
Do note that not all computers or graphic cards support changing the hardware acceleration option. If your display adapter does not support it, you may end up getting no option for the troubleshooter under your display settings.


Hey Timmappa Kamat ,
Great post with effective tips to turn off the hardware acceleration on window-10. Thanks for
highlighting this topic and making us aware.
It is my first time commenting on your blog post and i must say that you have done a fantastic work and suggested helpful tips to turn off the hardware acceleration on window-10. Also thanks for including helpful images on your post, as it provide better understanding.
Your each of the suggested steps to turn off the hardware acceleration on window-10 by using two different methods are so clear, easy to understand and follow, whereas following the steps will be helpful and allows several user to turn off their hardware acceleration on window-10. Your both the methods works well but i truly like method-1.
Truly informative post and thanks for sharing.