With the right tools and practice, you can create beautiful laser engravings on acrylic and glass. Both acrylic and glass are softer, making them easier to engrave. However, they are more likely to crack or shatter if the laser engraving is not done correctly. In this article, you will learn the steps you need to follow to make beautiful laser engravings on acrylic and glass. But before that, let’s look at what laser engraving is in detail.
What is Laser Engraving?
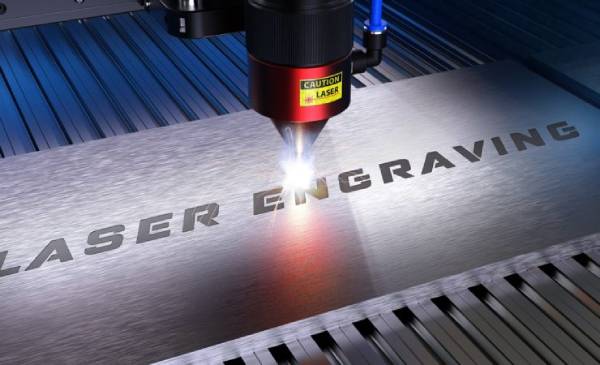
Image credit: laszeray
Laser engraving is a process that uses a focused laser beam to create an image or text on a surface. The laser beam interacts with the material’s surface, causing it to heat up and vaporize. As the laser beam moves across the surface, it removes material layer by layer until the desired image or text is created.
Laser engraving is often used for creating precise images on metal, glass, plastic, and wood. It can also be used for engraving logos and other designs onto surfaces. It can also create illustrations, logos, or text on various surfaces.
Steps for Laser Engraving on Acrylic or Glass
The first step is to gather your materials. You will need the following:
- A piece of acrylic or glass: This is the material we will engrave on.
- A laser engraver: Various laser engravers are available depending on the type, cost, and power. You can get the best laser engraver at a lower price either online or in your local shop that can engrave on acrylic or glass well.
- Design software: You will use design software to prepare the file that you will use to engrave on the material.
- Cleaning materials: You need a piece of cloth, detergent, and water to clean your material and design before and after laser engraving.
Once you have your materials, you can follow the steps below:
Step 1: Clean The Acrylic or Glass
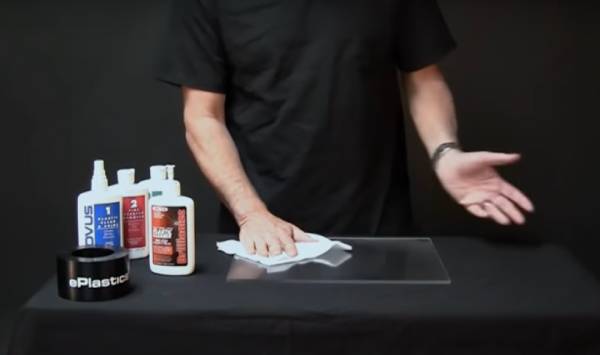 Image credit: AGCsigns
You need to clean the surface when using acrylic or glass for laser engraving. Otherwise, dirt and debris will be transferred onto the material, which can cause the engraving to be unclear. The best way to clean the surface is to use a mild soap and water solution.
You can also use a commercial window cleaner that does not contain ammonia. Once you have cleaned the surface, you should dry it thoroughly before you start engraving. Otherwise, the moisture will cause the laser beam to diffract, resulting in poor engraving quality.
Step 2: Prepare Your Design and Set Up your Laser
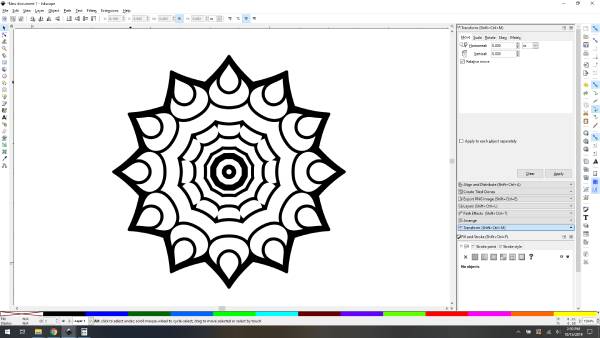 Image credit:Glowforge
Create your design in vector format. This can be done using a program like Adobe Illustrator or Inkscape. A vector file is preferred because it ensures that the lines of your design are crisp and clean when engraved onto the acrylic.
Once your design is ready, the next step is selecting the proper settings for your laser engraver. When engraving onto acrylic or glass, you’ll want to use lower power and a slower speed setting. This will prevent the acrylic from burning or melting during the engraving process.
It’s also essential to test the settings on a piece of scrap acrylic first. This will help you get a feel for how the engraving will look and allow you to make any necessary adjustments to the settings. Once your design is ready, it is time to start the laser engraving process.
Step 3: Laser Engraving Process
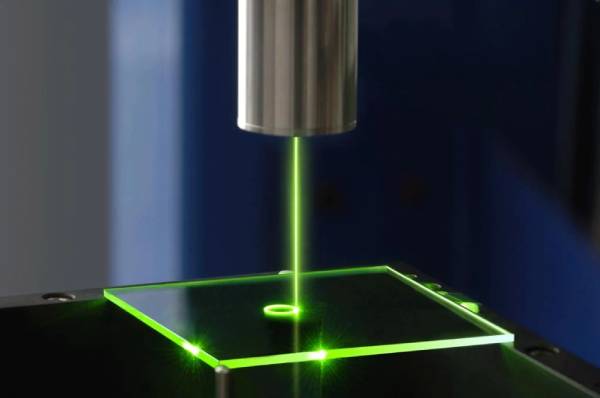 Image credit: Acousticremedycases
Once you have your vector file, the next step is to send it to your laser engraver. Most machines will accept files in either DXF or AI format. Once your file is loaded into the laser engraver, you’ll need to select material settings for acrylic or glass. After your machine is set up, watch as your design is engraved onto the material.
Step 4: Cleaning Up Your Piece
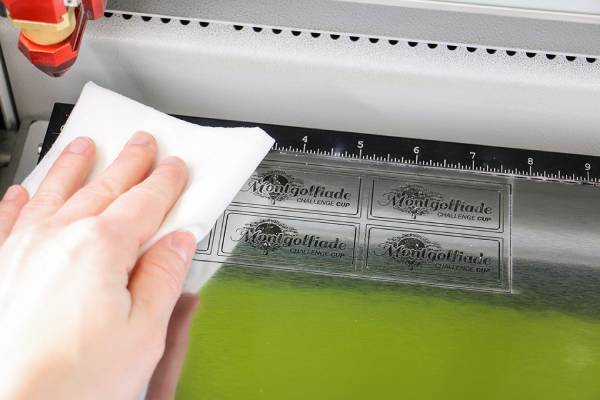 Image credit: engraving-supplies
Once you’ve completed your engraving project, it’s time to clean up your work area. You can brush off any debris with a soft-bristled brush. Once you’ve removed all loose debris, you can use a mild detergent and a soft cloth.
Rinse the detergent thoroughly afterward, as leaving it on the surface can cause corrosion over time. You can also use paint, markers, or even glitter to add some extra pizzazz to your laser engraving.
Tips for Laser Engraving Correctly
Laser engraving on glass and acrylic can be challenging, but it can be easy and fun with the right tips and tricks. Here are vital tips to consider following:
- Use a low-power setting: When laser engraving on glass or acrylic, it’s essential to use a lower power setting than you would on other materials. This will help prevent the material from shattering or cracking.
- Keep the glass cold: Using cold air or wet paper, you can keep it cold.
- Experiment with different settings: Every laser is different, so it’s essential to experiment with your machine’s settings before engraving your project. Start with the lowest power settings and gradually increase the power until you find the perfect setting for your project.
- Use masking tape: If you’re engraving a design with multiple parts, it’s a good idea to use masking tape to keep the different pieces in place. This will prevent your design from becoming smudged or blurred.
- Test first: Always test your design on a scrap piece of material before engraving it onto your final product. This will help you avoid any costly mistakes.
- Keep it simple: When in doubt, less is more. A simple design will usually look better than a complex one.
- Consider the orientation: How you orient your design can significantly impact the final product. For example, engraving a design horizontally will usually produce cleaner lines than engraving it vertically.
- Take your time: The process can be slow, so it’s essential to be patient and take your time. Rushing through the process will only result in poor-quality work.
Conclusion
Laser engraving is a great way to add a personal touch to any project, gift, or home decor item. You can create stunning and unique engraved designs on glass or acrylic with just a few simple steps. Just remember to take your time and practice before attempting more complex designs.


Add Comment