You can also title this article; How to Download ChatGPT Data or How to download ChatGPT Chat Conversations.

A few days ago, I have written an article to save and share ChatGPT conversations using a Chrome Extension. That is really good because it does the job of saving the chat history in a proper and well-formatted manner which you can download as an HTML file, and share with anyone via email.
This article is going to be a little similar, but in this, I am going to show you how you can export ChatGPT Data without using any extensions. And, yes, not by copying-pasting as well.
What All are there in ChatGPT Data?
ChatGPT Data that you export will have these:
- Chat Conversation history in HTML file
- ChatGPT Account information is in Jason’s file.
- Few Other Jason files which you may not need such as chat logs, etc.
The most needed data you get is the chat conversations which you can use to send to anyone when there is any need.
When you export the ChatGPT data, you get an email from them instantly with the Export file. You can click that, and you will get a zip file downloaded to your computer.
Now, you can extract the Zip file, and you will get the data that is exported.
Steps to Export or Download ChatGPT Data
Step 1: First of all, visit ChatGPT platform. You will see this:
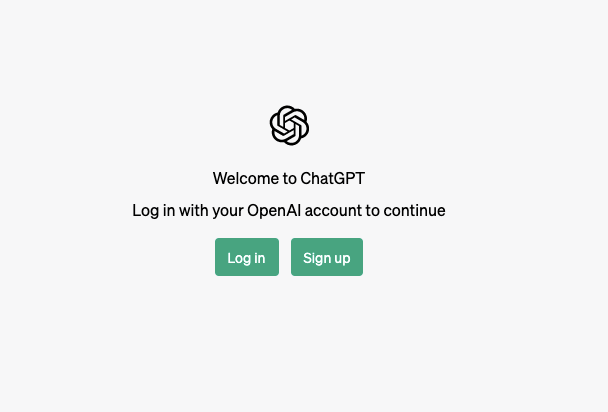
Step 2: Click “Log in” if you already have an account that I consider, you have.
Step 3: If you have signed up with a Google account, you can click “Continue with Google” or if you have done with Microsoft account, you can click “Continue with Microsoft Account”. Or, if you have an email address and password, you can enter that to log in.
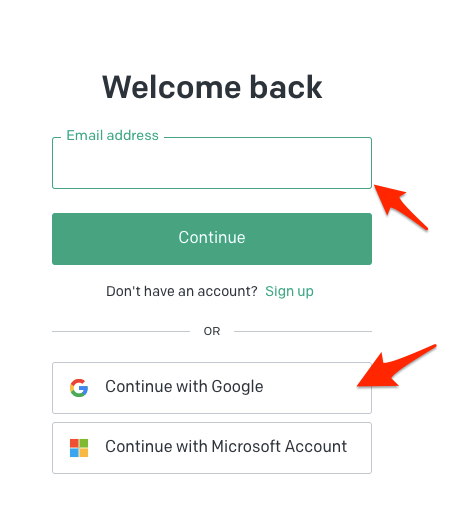
I have used my Gmail, so, I would click “Continue with Google”.
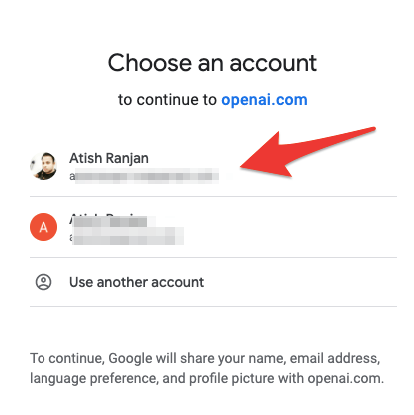
Step 4: Now, you will see all the logged-in Gmail accounts on your laptop. Choose the one you have used to sign up for ChatGPT.
Step 5: As you click, it will take you to the ChatGPT interface where you can use it.
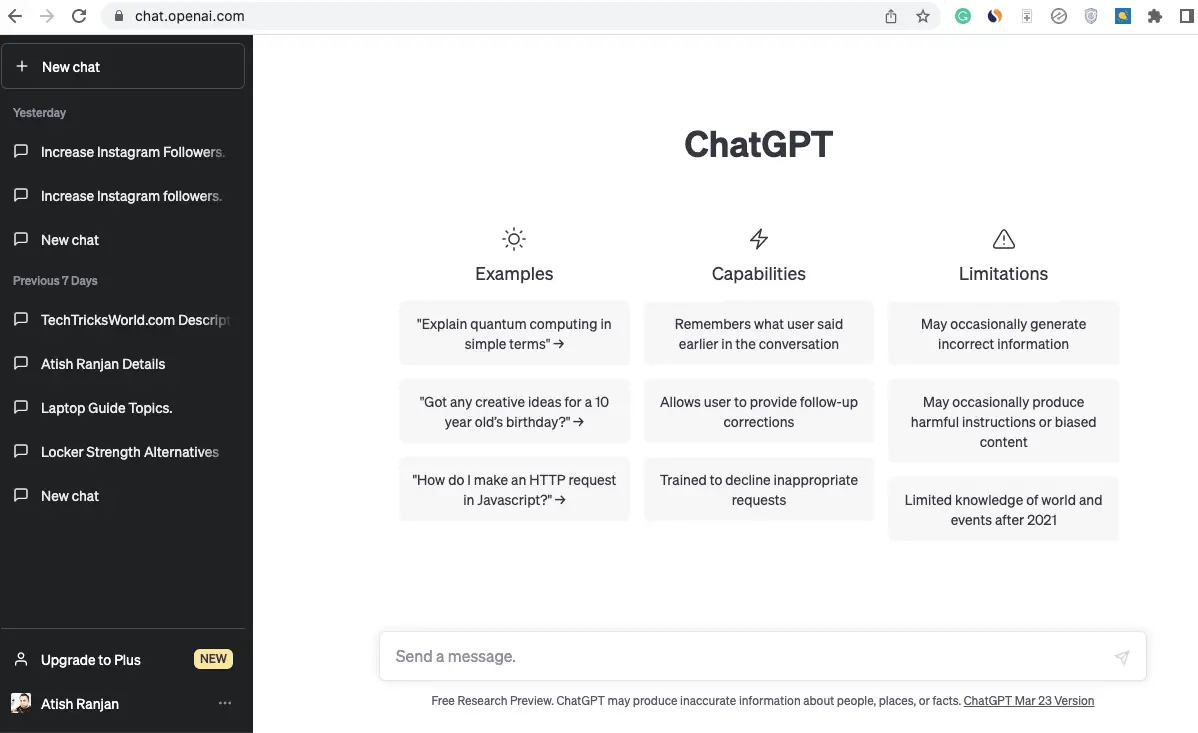
Step 6: Now, you will see, there are many conversations on the left of the screen. When we will export the data, these all will be exported.
Now, click on the 3-dot menu next to your Profile Name.
As you click, you will see there a few of the options appeared.
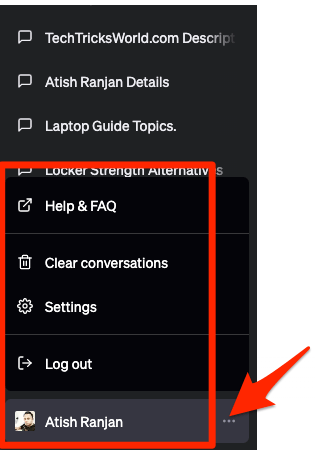
Step 7: Click on “Settings”

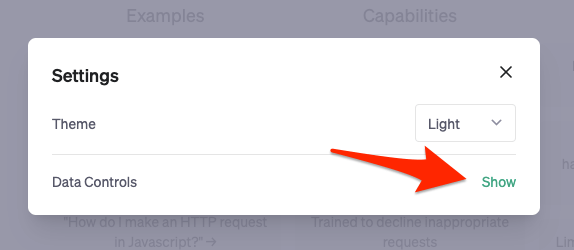
Step 8: You will see a Window with Theme and Data Controls options. Click “Show” next to Data Controls.
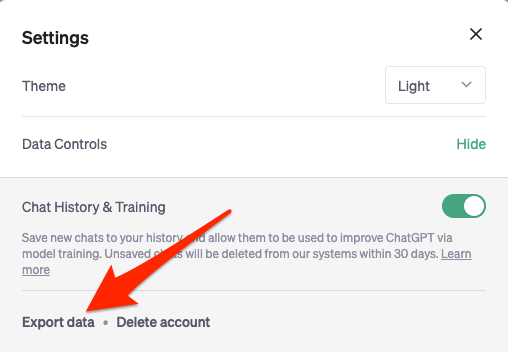
Step 9: There you will see a few options set by default. Now, you have to click “Export data”
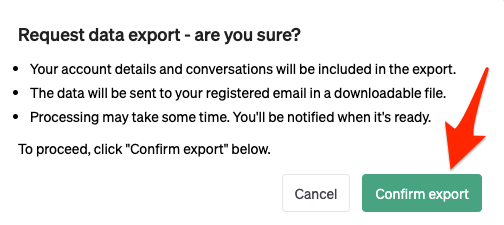
Step 10: You will be prompted with an Alert that states the details about the export. Now, click on “Confirm Export”
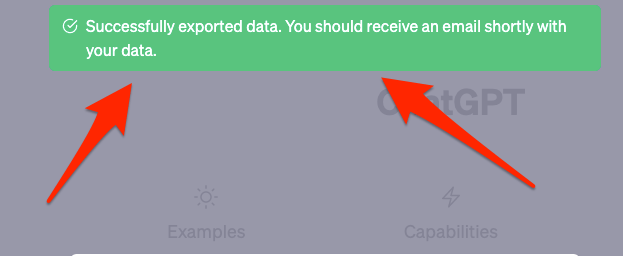
Now, you will see a confirmation at the top of the screen saying that the export will be emailed shortly.
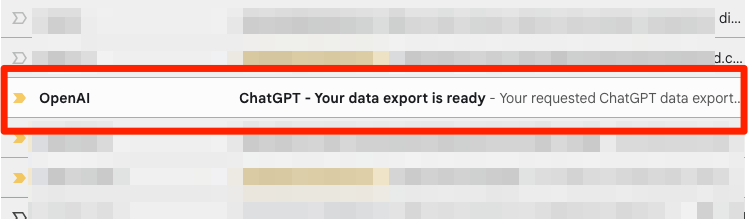
Step 11: Go to your Email, and you will find an email with the Subject “ChatGPT – Your data export is ready”
Step 12: Click to Open the email, and in the email, click “Download data export”
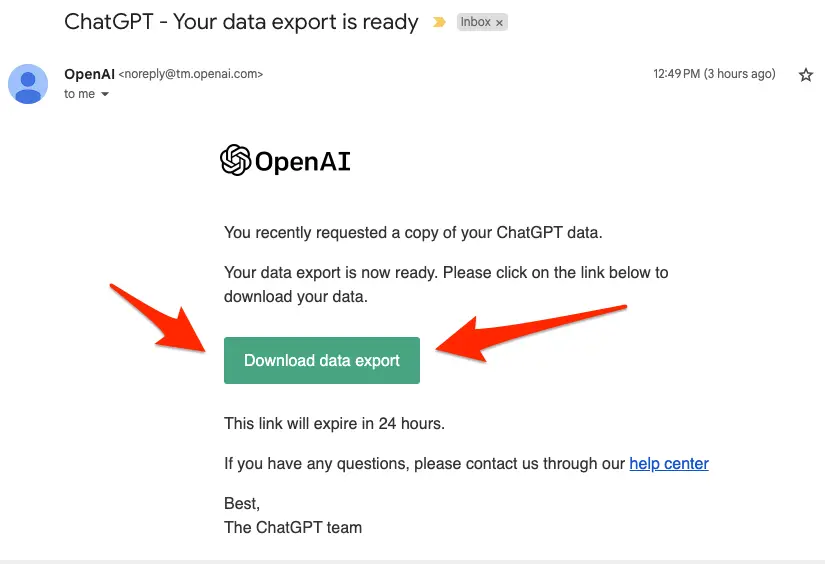
The data will be downloaded as a Zip file.
Step 13: Extract the Zip file, and you will see a few files.
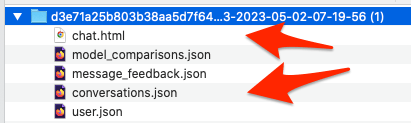
Now, you can view each file by opening them. Moreover, mainly, you would be interested in opening Chat.html as it will have the chat conversation history saved. When you will open that, you will see all the questions and answers saved in that file with their thread names.
Now, you can send this HTML file to someone if you needed to.
You may check other exported files as well if required.
So, this is the way, you can export and send ChatGPT chat conversations to anyone without using any plugin or extension.
Conclusion
ChatGPT is an awesome platform for getting your queries answered in a good manner. Exporting the chats and other data may be useful at times. So, knowing this would help you save your time because if you don’t know, you will keep copying and pasting the threads which will take a lot of time. But, with this Export data feature, the work will be done quickly.
Note: Sometimes, the export data may reach you late in your email. Most of the time, it reaches within a minute.


Add Comment