ChatGPT is an AI chatbot that is based on GPT 3.5, and GPT 4 Language models. It does whatever you ask through the text commands. For example, if you ask ChatGPT to write content, it will write; if you ask it to write code for a certain thing, it will do; if you ask it to write a poem, it can do that as well. It is simply an amazing tech that is changing the way the tech world has been.

In the ChatGPT interface, whenever you create a new chat, it gets automatically saved as a conversation with a default Title that takes from the first question of the conversation.
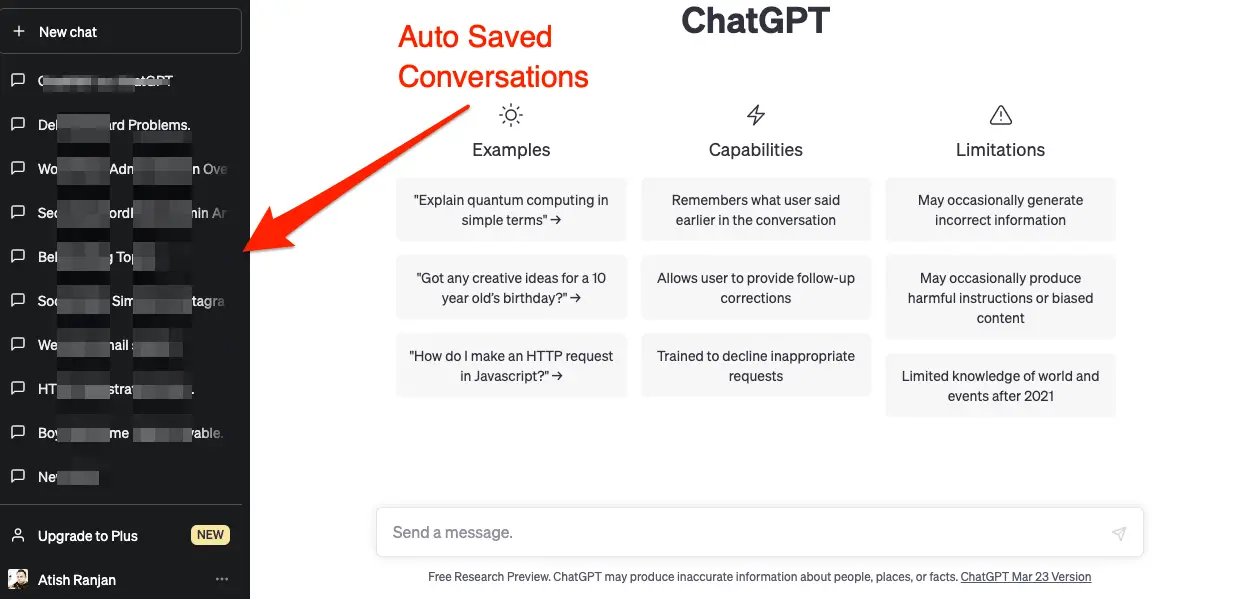
To resume the conversation, you can just click on the conversation from the left sidebar as you can see in the screenshot above, and continue by asking further queries.
When it comes to exporting or sharing the conversations; you have to do it the old way, Click on the conversation, then select the content, then copy that, and then paste it into the email body, and send it. This is really a time taking the job.
How to Save the ChatGPT Conversations the Other Way?
You may feel that the auto-save of ChatGPT is not that good for you, then in that case, you can just go ahead and install a Chrome extension called SaveGPT in your Chrome browser. This enables you to get the chat conversation history in one place, and that can be downloaded as HTML file as well. Now, you can send that HTML file that will have all the conversations included. This is the easiest way to export and share ChatGPT conversations.
Let’s find out how it works.
After you install SaveGPT extension, reload the ChatGPT interface, and you will see a new option at the top-right corner.
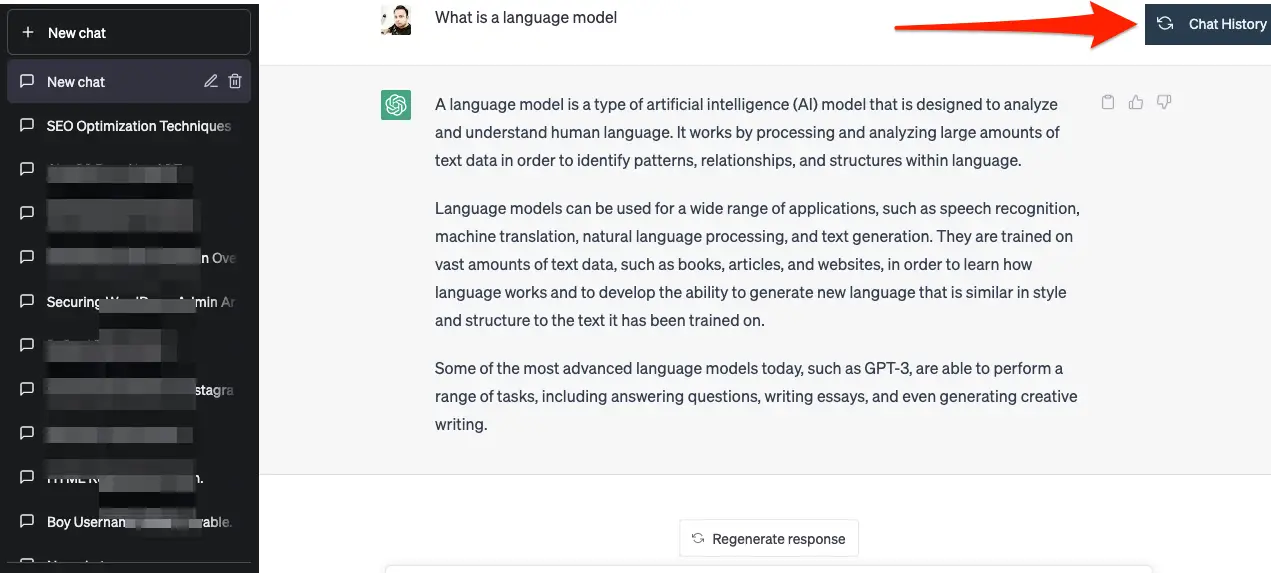
As you can see in the screenshot above, there is a new option appeared “Chat History“.
Be informed that it will not show the old chat which happened before installing the SaveGPT. It will show only those chats that are done after it is installed. For example, I have done two small chats after installing the extension, and now I click on “Chat History“.
Here is what it shows:
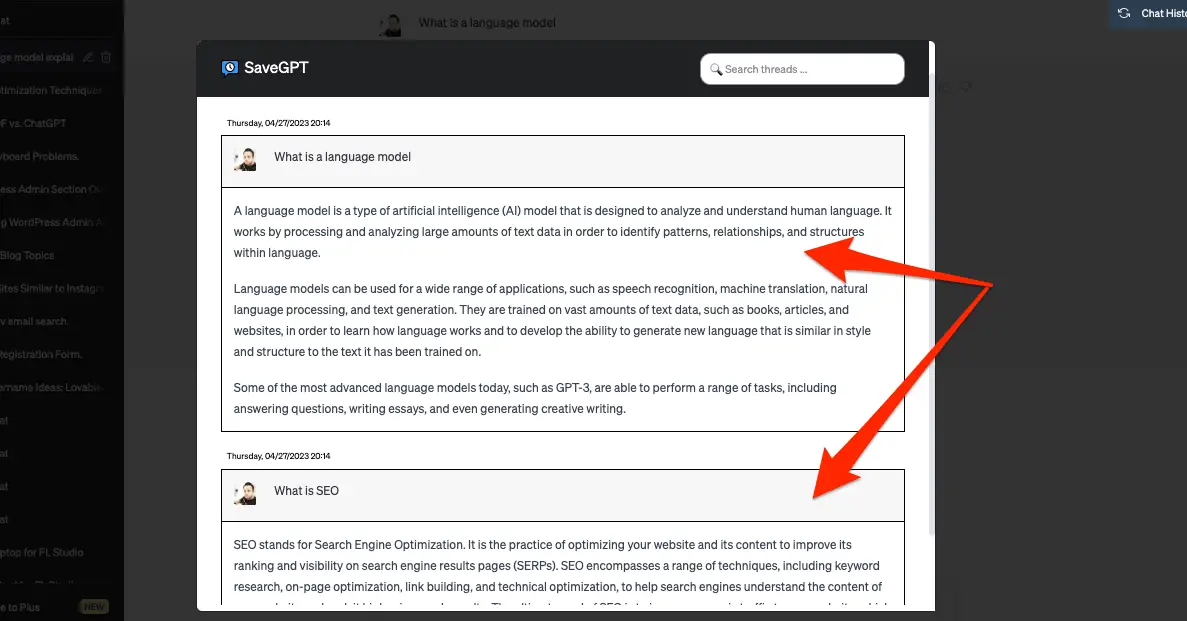
You can see that the latest chats are showing there, you can keep scrolling, and it will show all the chats.
The best thing about this is, you can click on Download All which you can see at the top of the chat history Window, to download all the chats.
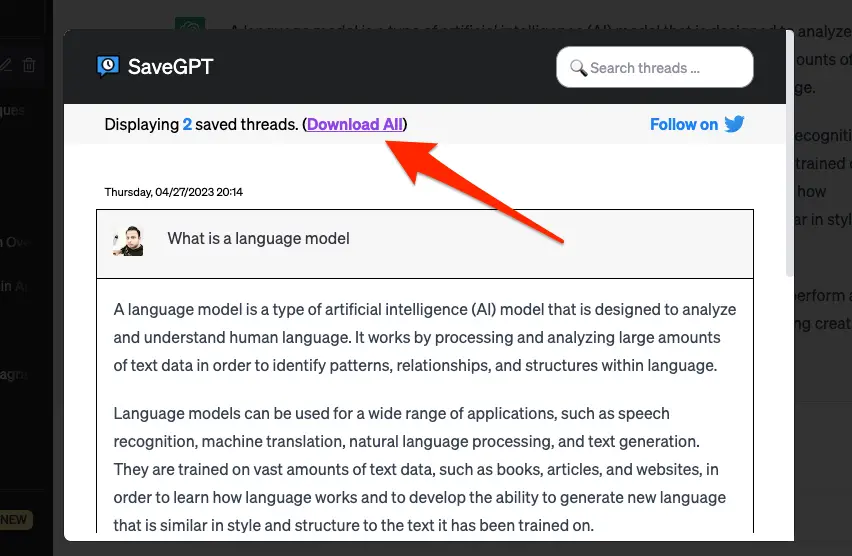
Once you click, it will ask you to follow them on Twitter, just follow them, and then again come to this window, and click Download All. It will be downloaded in HTML format.
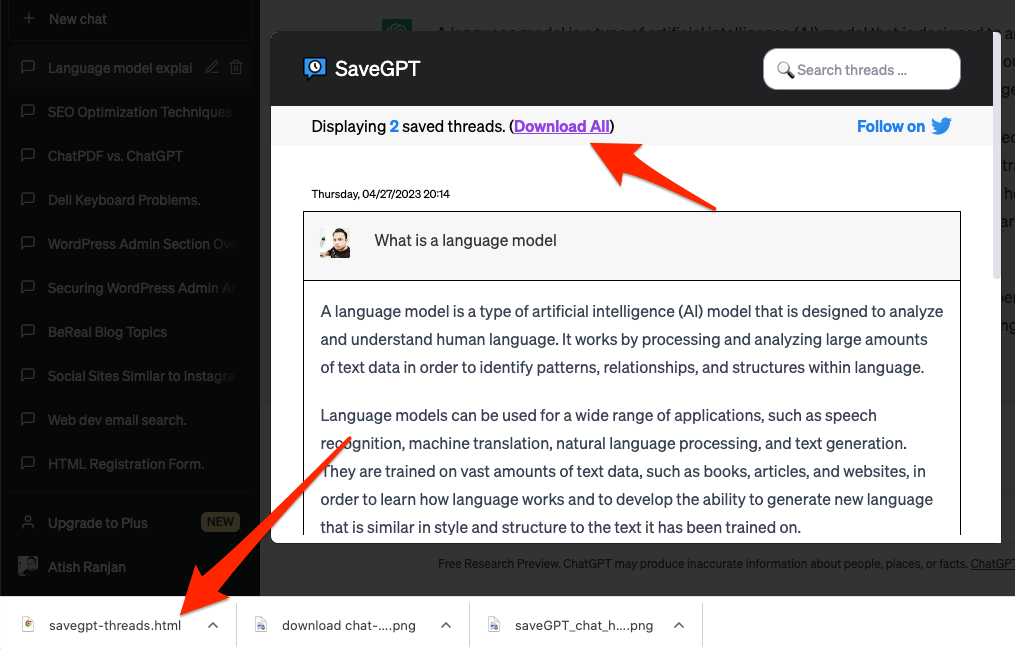
Now, if you open it, it is downloaded in a better format than the default autosave of ChatGPT. Also, all the history can be viewed on one page without clicking on each as you do in ChatGPT.

So, SaveGPT makes your work of saving the chat conversations and sending them to someone very easier.
How to Share ChatGPT Conversations?
When you rely on ChatGPT’s default save feature, you have to click each conversation, copy them, and paste them one by one in your email body or you can copy and paste each of them in a doc file and then attach them to the email. This is really a time taking process if you have to send so many chat conversation threads.
But, with SaveGPT as you are able to download all the conversation threads at once in an HTML file. You just have to go to your email, attach that HTML file, and send it. That’s it.
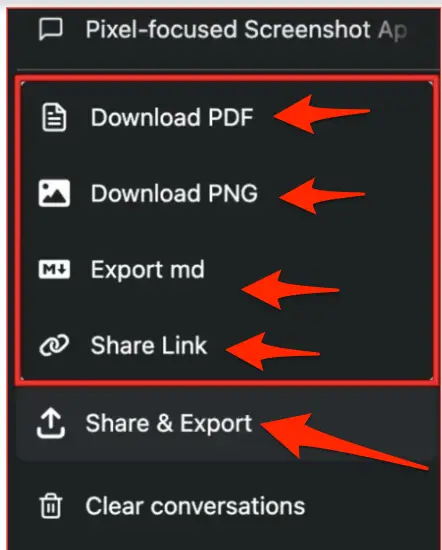
There is one more Chrome Extension called ChatGPT Prompt Genius which helps you create prompts, change the theme, and also gives the option to Share and Export the chat history as well.
How to Rename a ChatGPT Conversation Thread?
As already said earlier that whenever you create a new chat, it gets autosaved by ChatGPT’s default feature, and the default name it takes from the first question of every conversation mostly. If you have some important threads that you want to remember, it is a good idea to rename that to something memorable so that you can revisit them easily when required.
Follow the steps to do it.
Step 1: Go to ChatGPT interface.
Step 2: Click on one chat Thread, and you will see Pencil icon there
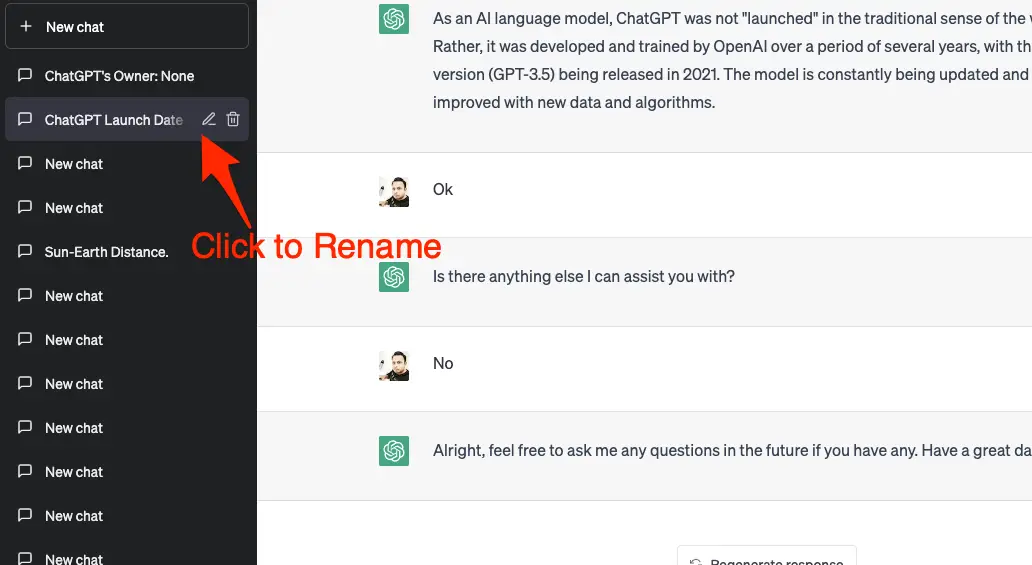
Step 3: Click on that, and type the name you want to keep for that. After typing the name, click the check icon there, and it will be renamed.

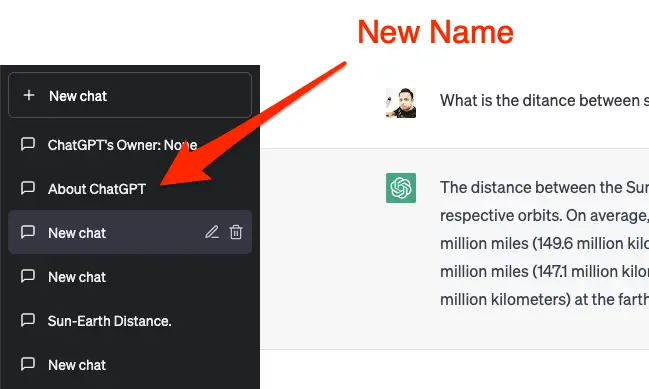
Now, you can see it renamed.
How to Delete a ChatGPT Conversation Thread?
When there are so many conversation threads autosaved, you may want to delete a few which are not required.
For this follow the steps:
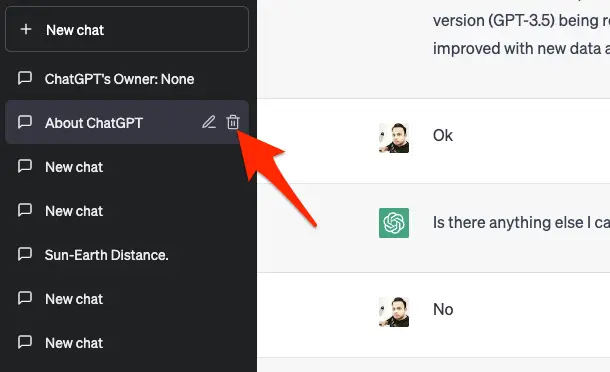
Step 1: Click on the Chat Conversation, and click on Delete Option.
Step 2: Click on the Check Box to confirm the deletion.
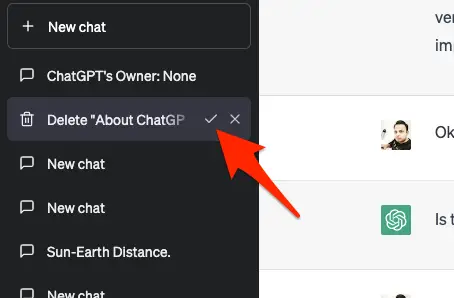
That’s it. The conversation will now be deleted.
How to Delete All ChatGPT Conversations at Once?
In case, you want to delete all the conversations at once, then at the bottom left, next to your profile name, there is a three-dot menu, click that, and now click “Clear Conversations“, and then click to confirm.

Now, all the conversations will be deleted from your ChatGPT account.
Conclusion
ChatGPT is a great tech, and the autosave feature is good enough as well. But, when it comes to exporting and sharing, I didn’t find it so good. Thus, I have started using SaveGPT for this purpose as it allows downloading all the chat conversations in one HTML file.
I hope you liked this guide. You can watch video as well for finding how SaveGPT makes the work easier.


Add Comment