When it comes to Agile software development techniques, JIRA has been an excellent choice. The high degree customization options offered by JIRA make it one of the exceptional choices for effective project management. It makes it easy for the project managers to check the deadlines and generate reports with ease and simplicity. They can also be helpful in handling tasks like real-time analysis rather easy.
Using JIRA for a wide range of requirements may not be more natural enough. In continuation of what we have been covering about different techniques in Jira, we will today find how to create a Sprint in Jira.
What is Sprint?
Well, before we can create a Sprint in JIRA, let us first understand what a sprint is. As part of the project management, the teams need to complete specific tasks within a particular frame of time. This time frame is known as Sprint.
Technically defined, a Sprint is a repeatable, fixed timeframe within which a team tends to create a result of the highest possible value. During a Sprint, you will be setting a specific time frame and complete a specific item of work.
Under ideal circumstances, a Sprint lasts two weeks. And it can only work with Scrum boards, and not Kanban boards. When you have multiple projects, you can have more than one sprint. You can create a Sprint and view the progress on a Backlog page.
How to Create Sprint in JIRA?
The first step in how to create a Sprint in JIRA would involve creating a new project or logging into your existing Scrum project. For the sake of this discussion and tutorial, we do assume that you are familiar with the concept of how to use JIRA to manage products.
Step 1 – How to Create Sprint in Jira
Log in to your JIRA Scrum board and click on Create Sprint.
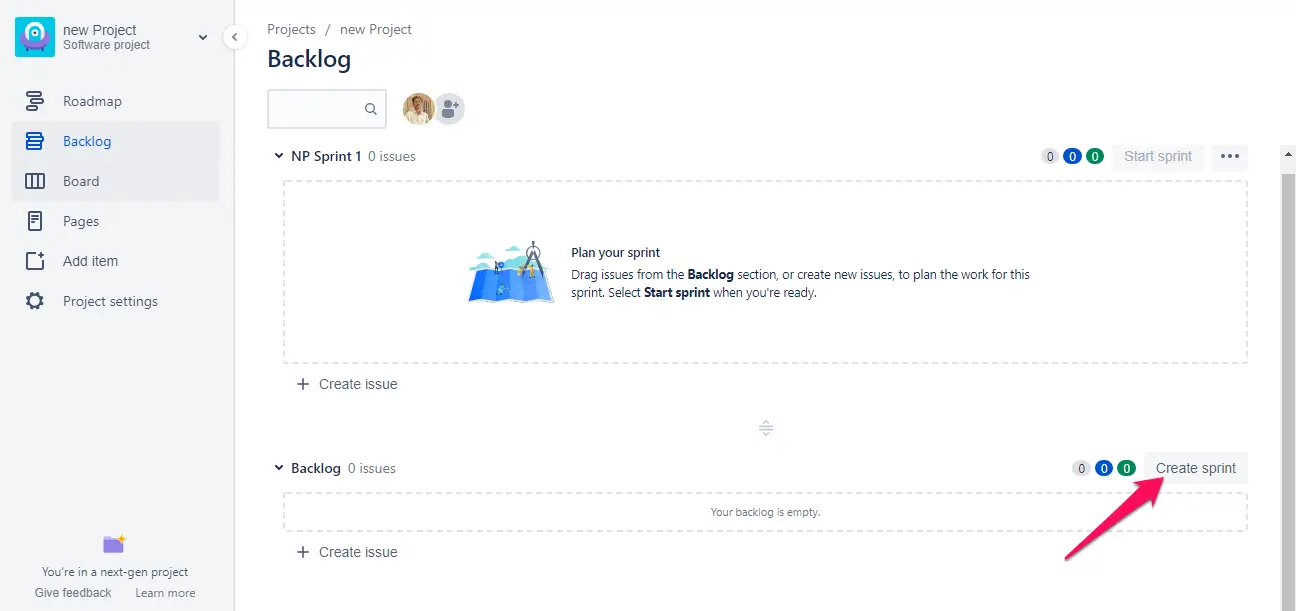
You will need to go to the Backlog of your Scrum project. You should quickly find the option to create a Sprint in the dashboard.
Clicking on it will take you to the next screen where you will be creating your Sprint. You can create more than one Sprints. It may be the right option to create a few sprints at this stage itself.
Click on the Sprints you just created. This will take you to the page where you can add the team and the Sprint description.
Step 2 – Plan your Sprint
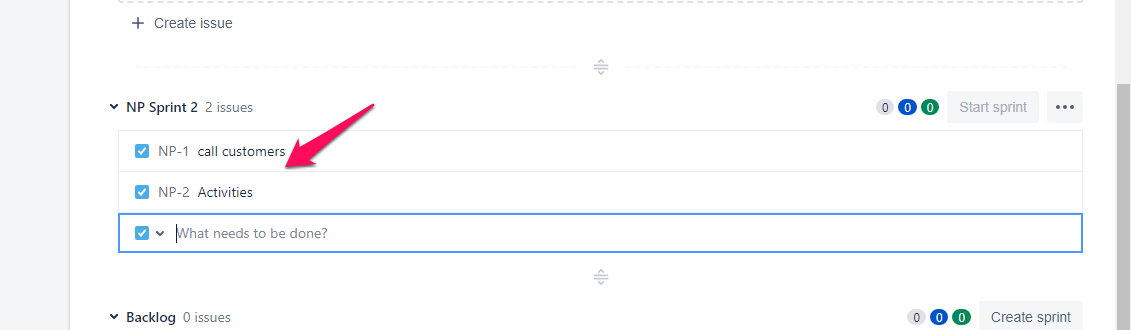
Once your new Sprint has been created, you can then plan it. You should find the option Plan Your Sprint in the backlog dashboard.
You would just need to drag the Sprints to the backlog in the order you would prefer.
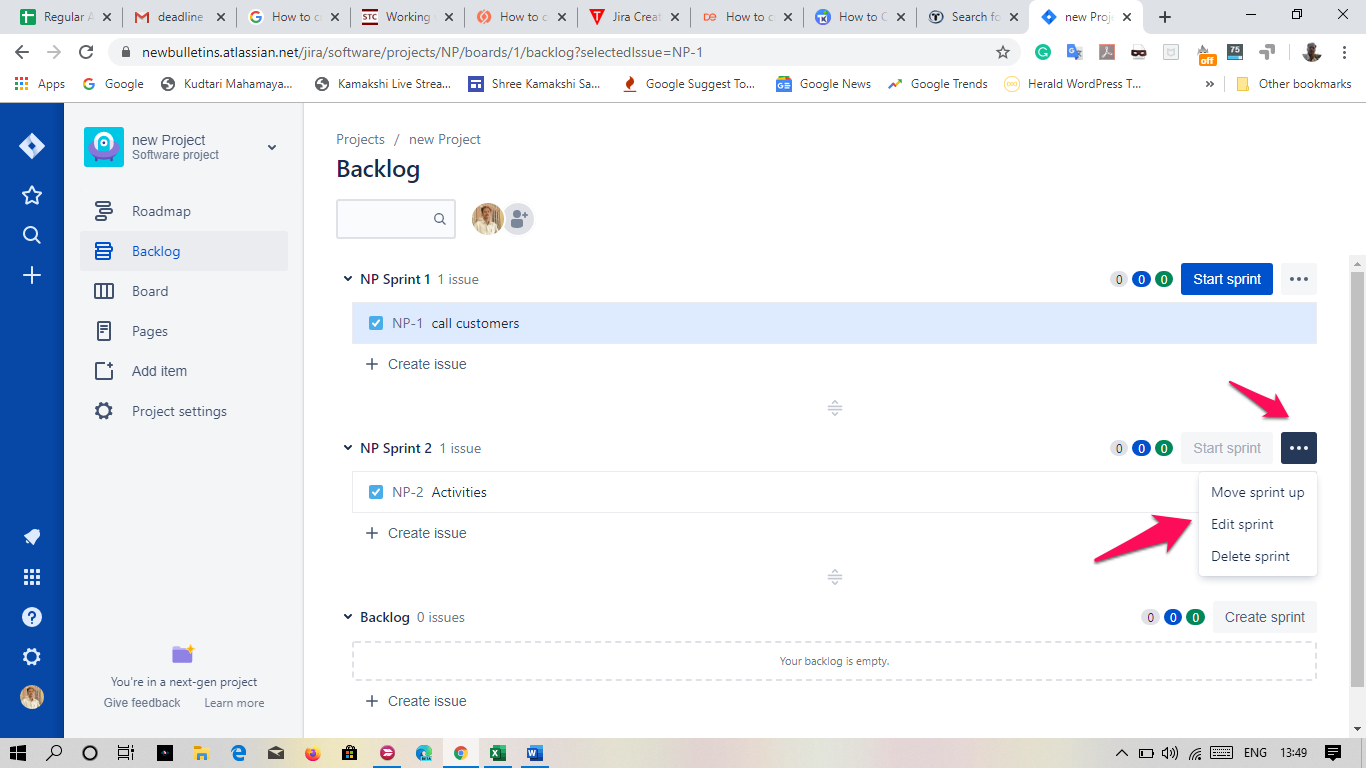
You can even add the Sprint to your backlog by clicking on the three horizontal dots and choosing Move Sprint Up.
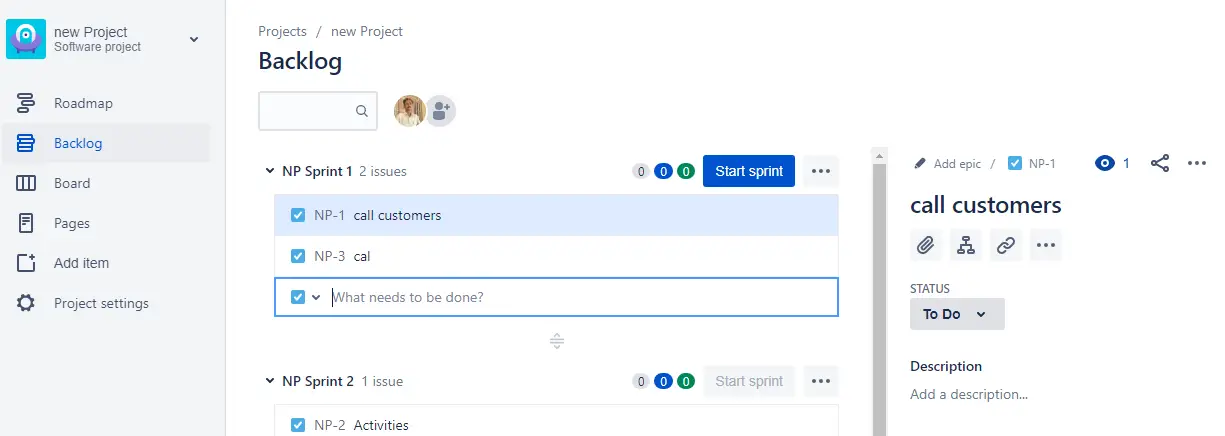
The issue will now be added to the Sprint. Once the Sprint has been added, you can include more issues. You can check the image below for a clear understanding. Just click on Create Issue and add the issue you would want to.
If you are a beginner, it may not be easy to add issues. You need not worry. The team can decide on which issues to be added in the course of the time.
Step 3 – Start Sprint
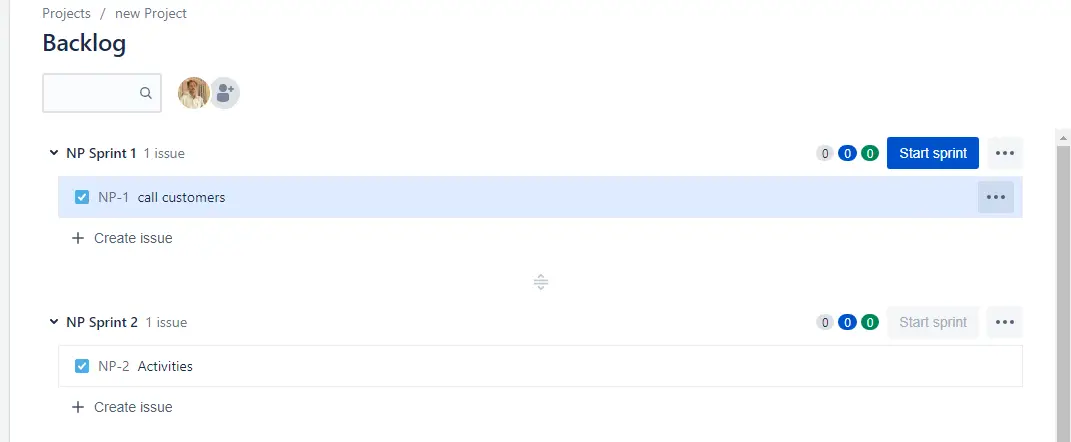
The next step will be to start the Sprint you just created. Make sure that you have added all the issues for a particular Sprint. Once that done, click on Start Sprint option at the top.

Clicking on Start Sprint will bring the screen for filling up additional details.
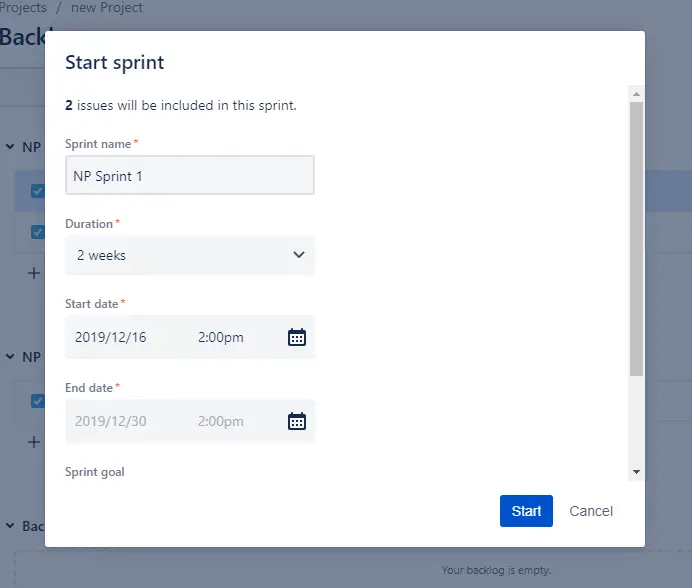
Fill in the relevant details as per your project plans and click on Start.
You will now be taken to the Active Sprints option, and your Sprint will be shown in the list of Active Sprints.
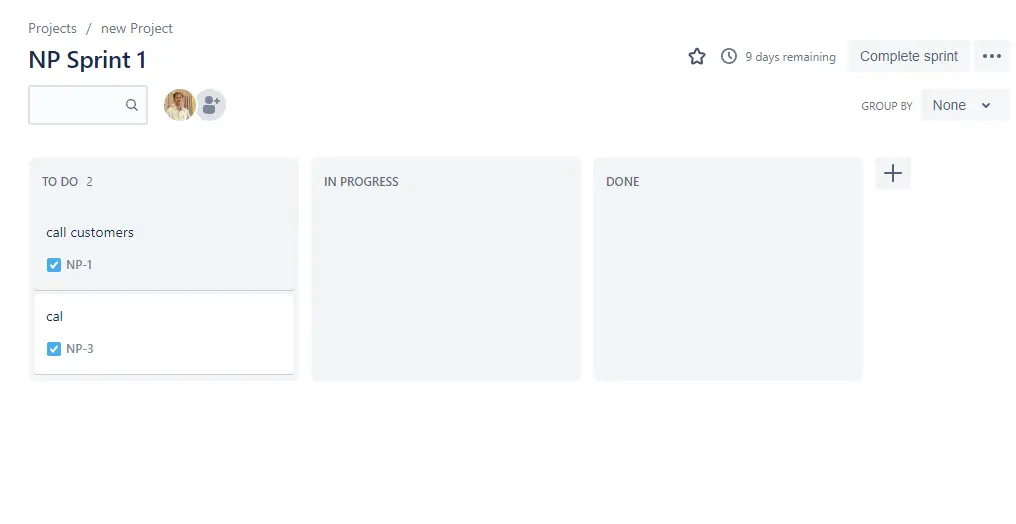 When the person you have assigned makes changes to the Sprint, it will move to the corresponding option. You can even drag and drop an issue from one column to another. The corresponding status details will change and will be visible to all the team members.
Well, that was how easy it was to create a Sprint in Jira. You can edit a Sprint or even delete it if needed from your Backlog dashboard.

Why is Sprint Planning needed?
Well, Sprint can let the team members work on a task and implement the necessary changes. In fact, it can be quite helpful in understanding the tasks and issues and take them towards a logical completion.
The ability to work with the requirements in a project in real-time with different teams is what would make it one of the preferred options you would want to go with. It helps provide a shared understanding of how to take up a project and how can it be approached as a team.
Any pre-requisites needed in how to create a Sprint in JIRA?
Yes, if you want to create Sprint in JIRA, you need to have a Jira account and a good understanding of how JIRA works. If you do not have a Jira account, you can create one. If you are just trying to get a feel of how to work with Jira before actually opting for the tool, you can choose the free trial and check out the different options and features offered by the tool.
Make sure you follow a few of the best practices for effective project management with JIRA. This will ensure that you can get the best out of your Jira experience and have access to a capable project management experience. And yes, do note that,– as we have already stated above – that Sprints can only be created and used with a Jira Scrum board. Make sure you learn how to create a Scrum board in Jira.
In Conclusion
Jira is a powerful project management tool in the agile management methodology and helps you become more productive in more ways than one. Sprints can be one of the best options in that direction and can be an excellent option for the efficient delivery of your projects. We assume the tips and tutorials here should have helped you effectively reach that goal.


Add Comment