Installing WordPress on your local computer will help you to test your blog before making it live. Mostly plugin and theme developers first test their theme/plugin’s features on local computer before testing on a live site. When they are sure about everything, then they use on the live site. If you want to make some changes in your site without affecting your server file then installing WordPress on a local machine is highly recommended.
Below are some important benefits for installing WordPress on local server
-
Fast access
Since all your blog files, WordPress setup files are located on your computer, you can access those files without logging on a server.
-
Quick and safe result
Any changes made on file can be check quickly. Those changes are completely reversible without affecting your server files.
-
Working offline
You don’t require internet connectivity while working on your blog which you have setup on your local machine.
-
Plugin test/ Theme Update
If you want to install any plugin on your live blog then it is recommended to test it before installing on your live blog. This can be tested on blog installed on your local machine. Any changes in themes file/folder can be done easily without affecting your main site.
Let’s start with the installation of WordPress on the local server. To install WordPress you will need to create a local server. Local server can be created using WAMP or XAMPP application.
Note: Install either WAMP server or XAMPP server on your local machine. You can download WAMP and XAMPP from its official sites
Download WAMP | Download XAMPP
Steps to install WordPress using XAMPP Server
Here I am using XAMPP server to install WordPress on a local machine. You can also use WAMP server to install WordPress on your local machine. You may also like to check, how to install WordPress manually on hosting server.
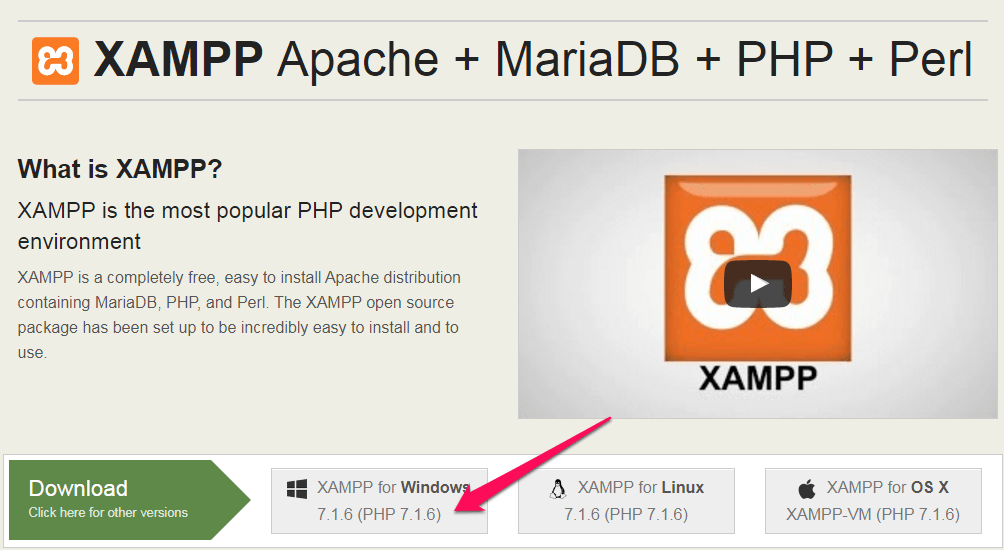
Step 1 => Download XAMPP application and install it by running downloaded .exe file.
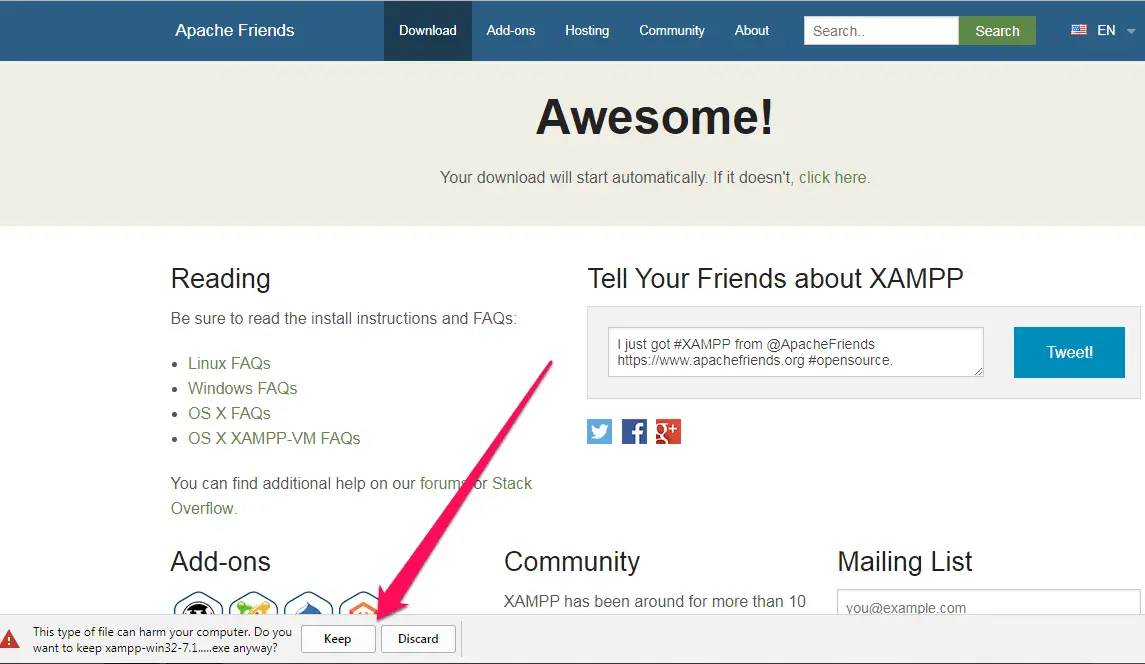
Step 2 => It may give a warning like Type of file may harm your computer. Don’t worry just allow permission to install it. There is nothing to worry about this file. It’s safe!
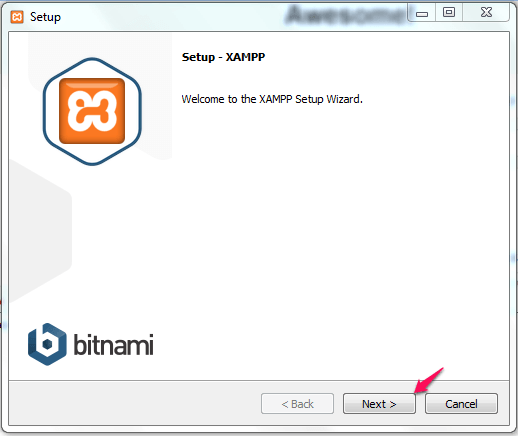
Step 3 => Once a file is downloaded. Launch installer to proceed with XAMP server installation.
Step 4 => Click on Next button to proceed with the installation.
Step 5 => Check/ Uncheck the checkbox to install required component. Apache, MySQL, PHP, phpMyAdmin is compulsory to create a local server. Make sure those are checked. Click Next button for next step.

Step 6 => You can define the path for XAMPP server installation. If you want default path then just click ‘Next’ to proceed.

Step 7 => Here I am going to show you, how to install WordPress manually. Hence uncheck checkbox as shown below. If you continue with the checked option then it will take you to auto installer page. Let’s do it manually. It’s not too hard to skip!
Step 8 => Now you are done with precheck and you are ready to start with installation steps. Click Next to start an installation.
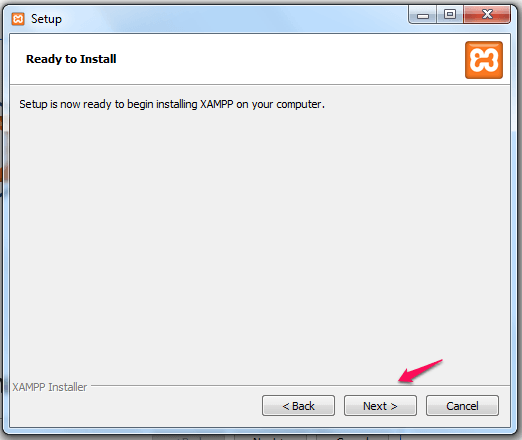
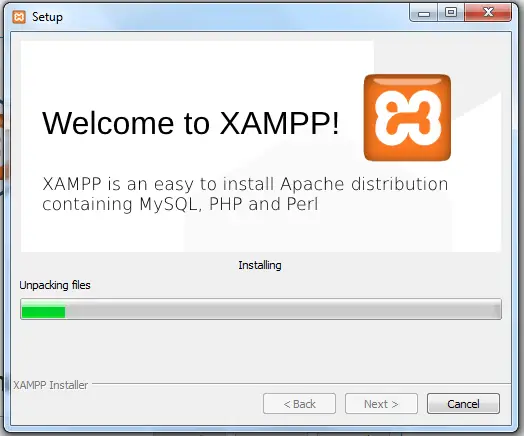
Step 9 => The installation will take few seconds to 1 minute. Wait till installation is completed.
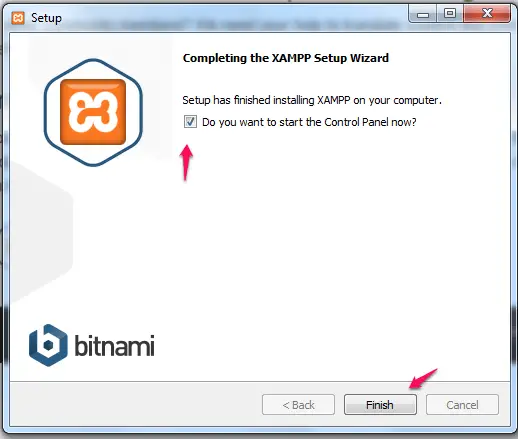
Step 10 => Once the installation is complete, at next step it will give the option to start control panel of XAMPP Sever. Just check the checkbox and click on Finish button. If it doesn’t give this option then you can start control panel from the start menu>>XAMPP>>XAMPP Control Panel.
Step 11 => While starting it may ask you to choose a language for the control panel. Just select one and save it.

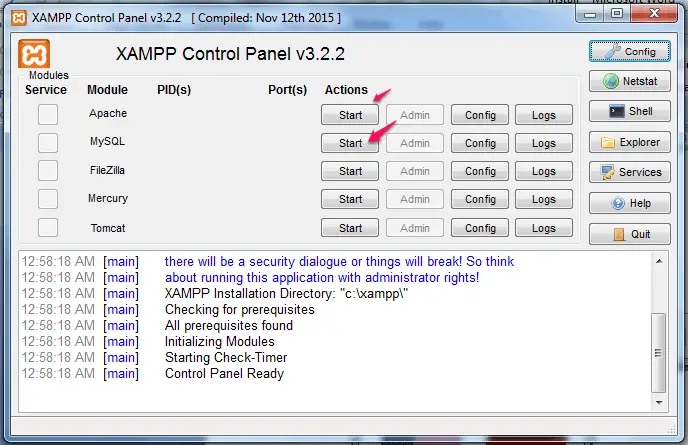
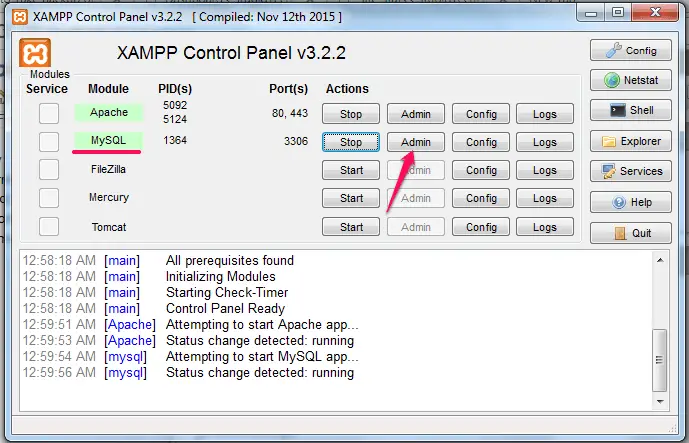
Step 12 => Once XAMPP server is launched click on ‘Start’ button in front of ‘Apache’ and ‘MySQL’ option as shown in below screenshot. This server is important to start, to create a local server with the database to host your blog content and database locally.
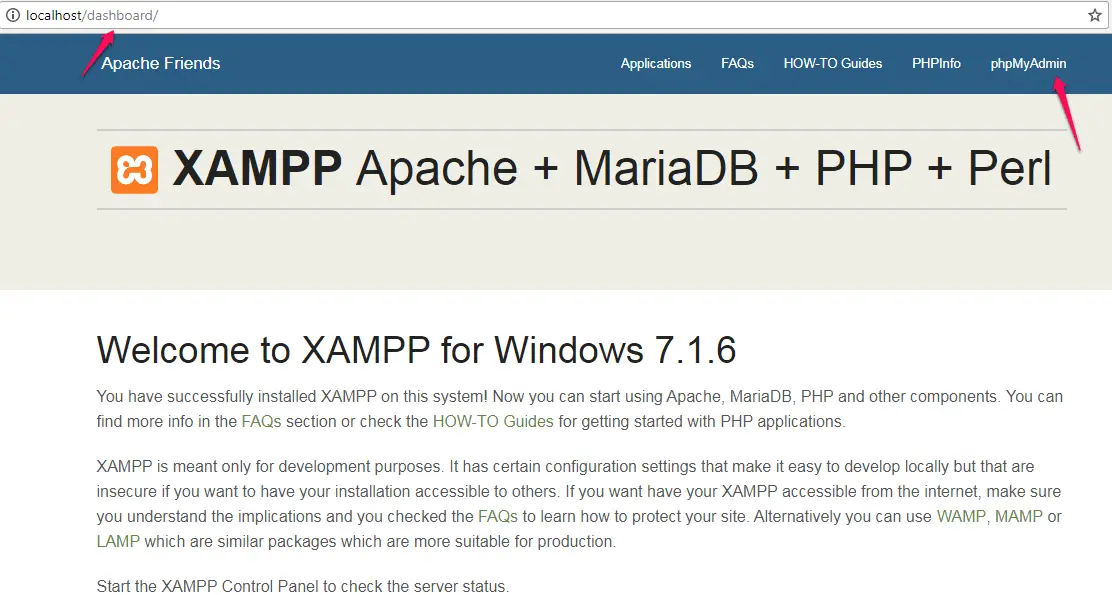
Step 13 => Done! Now the local server is created on your machine and you are now ready to install WordPress in your system. To confirm whether local server is created successfully. Visit http://localhost in your browser. You must get below page.
Step 14 => Before starting with a WordPress installation, we will require a database for our blog which we will be creating in some time. Let’s start with database creation. It just couple of click away.
Step 15 => There is 2 way to go to database homepage called as phpMyAdmin. Either click on phpMyAdmin menu shown in step no.13 or click on Admin button in front of MySQL in XAMPP control panel.
Step 16 => Above step will take you to phpMyAdmin dashboard. Here you can create a database for your blog. For example, I am creating a database with the name as ‘wpwars’. Click on Database menu and give database name followed by clicking on created button.
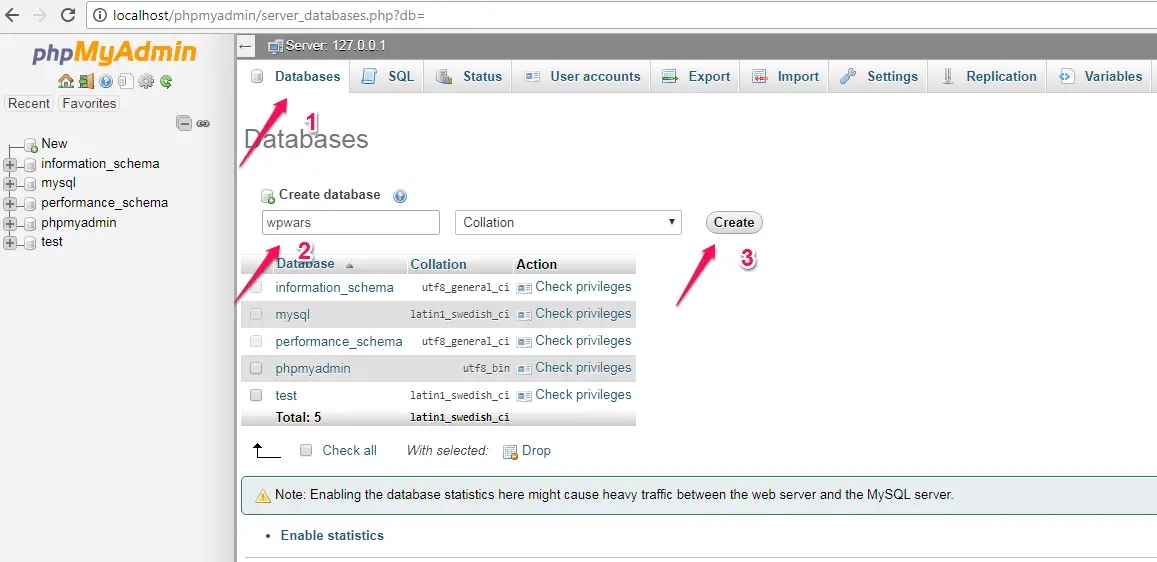
Hurray! You have created a database for your local machine blog.
Step 17 => You know what? Now you are ready for manual WordPress installation.
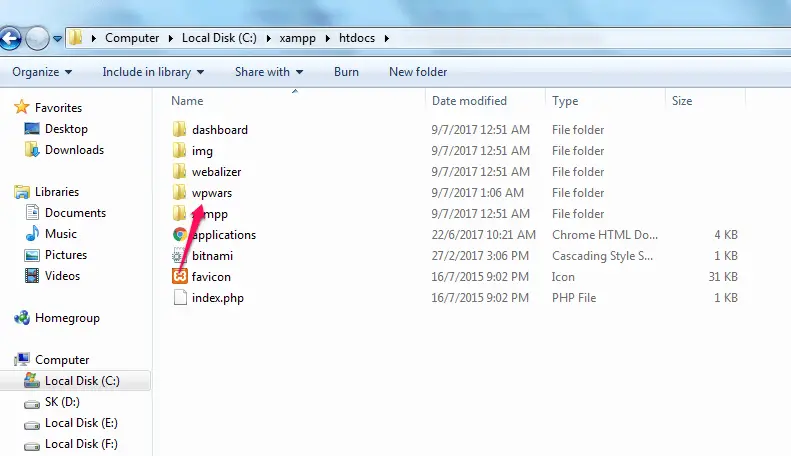
Step 18 => Create one folder for your blog file at location C:\xampp\htdocs. Here I have given wpwars as the folder name for my blog.
Step 19 => Download WordPress latest zip file and unzip in the folder created in above step.
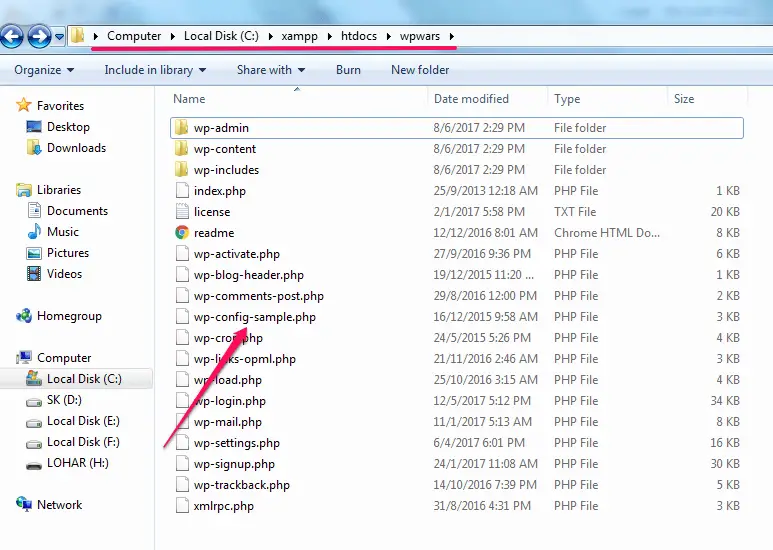
Step 20 => In above screenshot, I have pointed one file ‘wp-config-sample.php’. It is one of the important files which contain your database and server credential. You may not change this detail manually. It will ask while starting WordPress installation. But you should know that your credential is stored in this file.

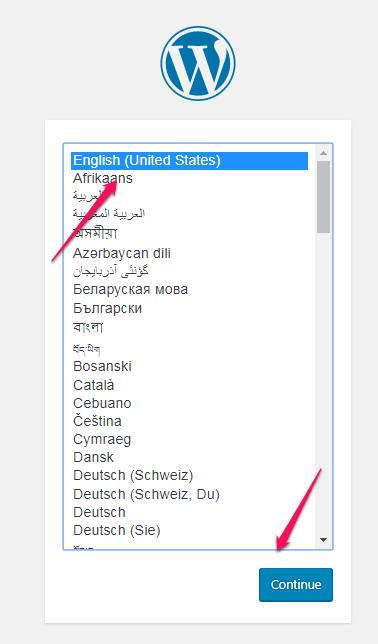
Step 21 => Now go to your browser and type ‘http://localhost/wpwars‘ (http://localhost followed by ‘/folder_name’). It will show the first step of WordPress installation. Select language and click on Continue button.
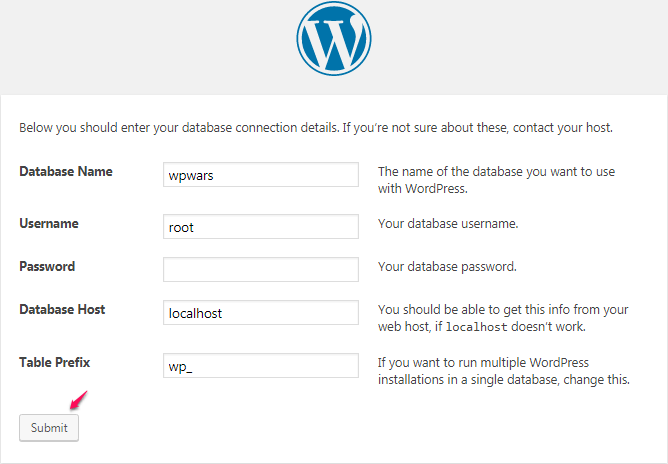
Step 22 => Here you go, now enter your credential which will be updated in wp-config-sample.php file and it will be saved as wp-config.php file at the same location. Enter database name as created above, username as root and leave password textbox blank. Finally, submit detail to update it on a local server.
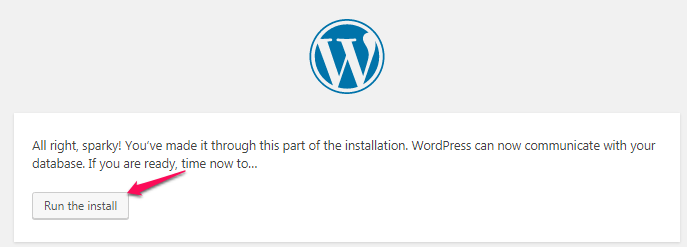
Step 23 => Just click on Run the Install button.
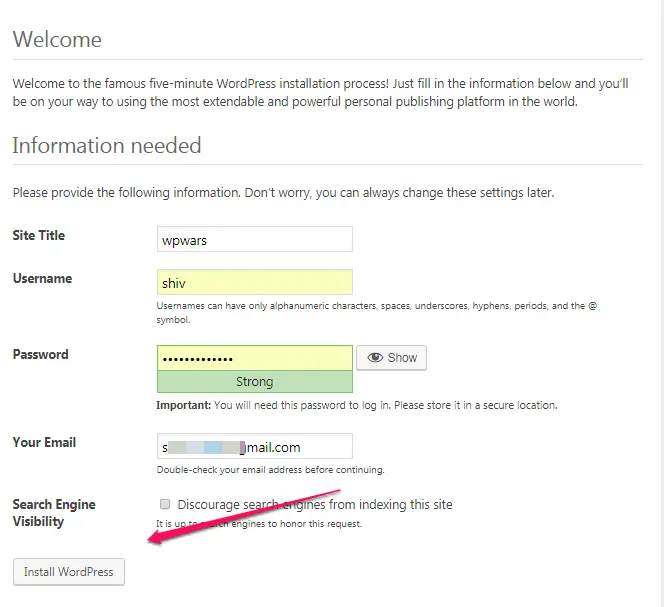
Step 24 => This is the last step. This step will decide your login credential for accessing your blog dashboard. Enter credential of your choice and click on Install WordPress.
Step 25 => Great! You have successfully installed WordPress on your local machine. Now tell me, isn’t it so easy?
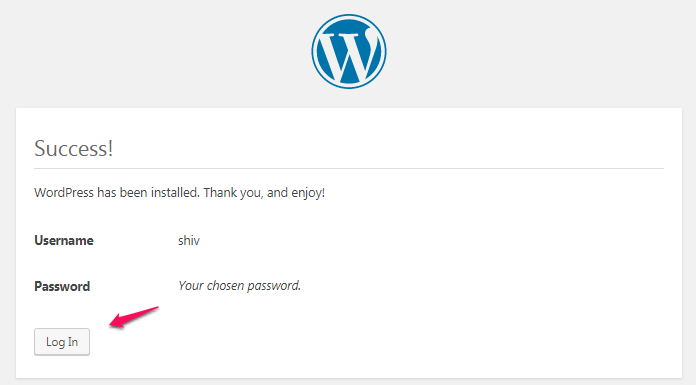
Step 26 => It’s time to access your blog dashboard and home page. You can access your blog using ‘http://localhost/wpwars‘ and blog dashboard using ‘http://localhost/wpwars/wp-admin‘ (use credential created in step no. 24)
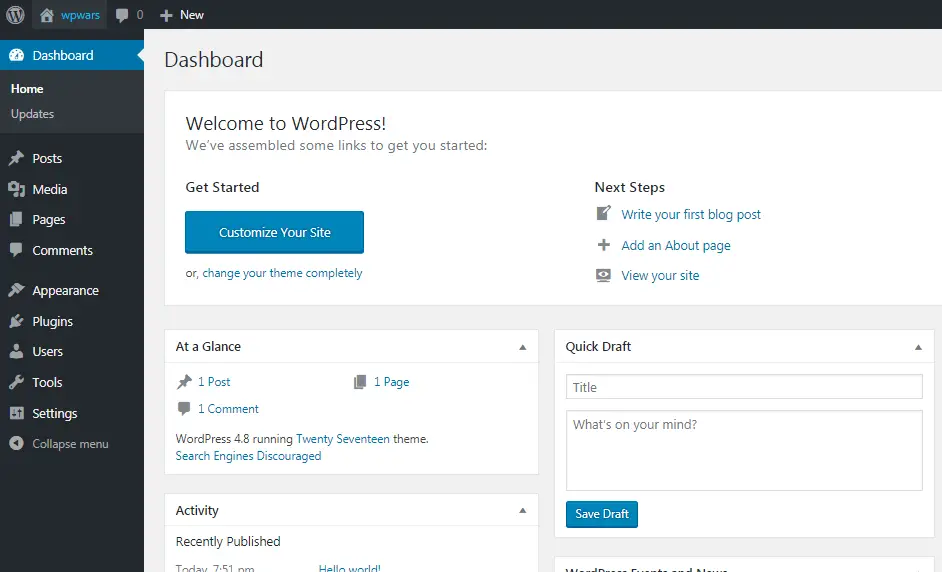
This is how your blog dashboard will look like.
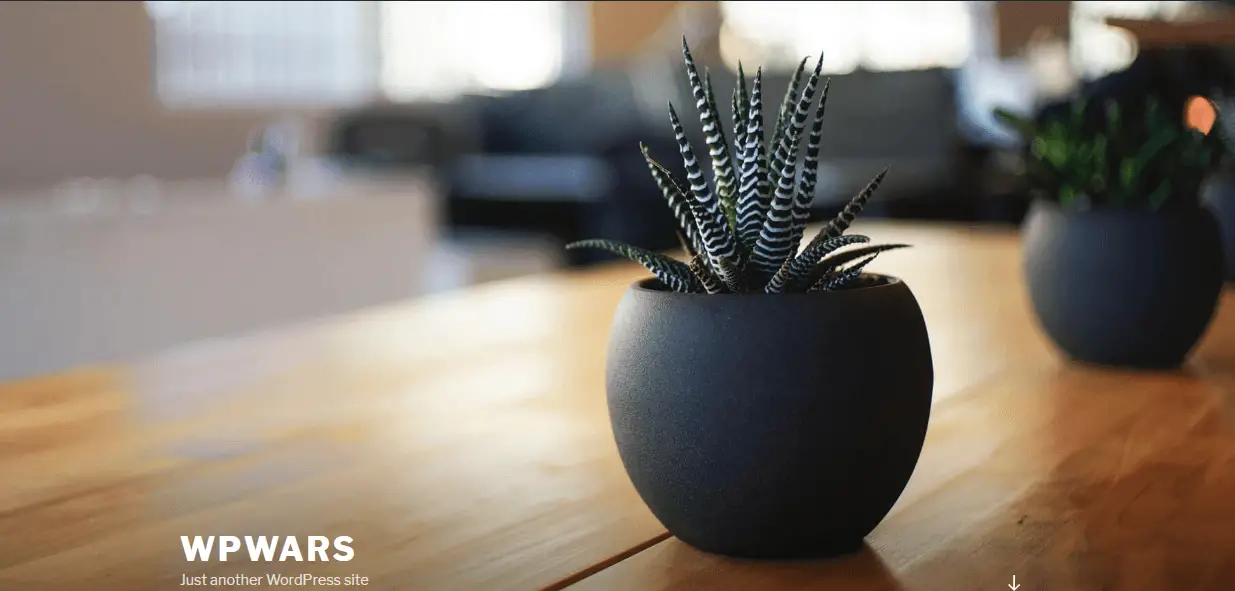
This is how your blog will look like (With Default theme of WordPress).
Summarizing
An application like WAMP or XAMPP will help to create a local server which can be used to run the server based application as shown above for WordPress installation on your local machine. I will be happy to help you in your difficulties while installing WordPress using above steps. Feel free to contact via comment and also share your experience with us.


Add Comment