Introduction
Before I start with my article, I want to add a note of thanks to Atish who has always been there to answer my questions and motivate me to write. He goes out of his way to help other bloggers and answers their queries with a lot of patience. That is what makes him what he is today – a successful blogger!
I started my blog – DailyMorningCoffee back in 2011 and I had many visions for it. I wanted to be known among the many famous bloggers, and for that, I did what I had to do – write original content and build relationships with other writers.
Why do you need an image for a blog post?
Images form an important part of every blog post. Even Yoast plugin mandates you to add an image and include the Alt text for it to be properly indexed and SEO friendly. To find original images which are free to use and have no licensing problems is a task every blogger faces. Once you find the right image, you again spend time to make it personalized and fit your blog content and format. There are many tools one can pick and choose to edit images. From the day I started my blog, I have been using GIMP to edit images and re-size them before posting them on my site. It has been helpful to an extent (in spite of the complicated menu items and image characteristics).
I used to spend quite a lot of time on GIMP trying to make sure the image properly fit my blog. Sometimes GIMP can be a pain particularly if you do not understand the aspects of images and their several inherent properties. Also, the layout of GIMP is a little overwhelming for first-timers. But hey, it served my purpose and it is free!!!
What other image editing tools are out there?
Being in the IT industry, I have been exposed to a lot of challenges with having to work with images that come in various formats and require processing and editing for consumption. Lately, we had a technical requirement at our work asking us to no longer support TIF images, but convert all of them into JPEGs and allow them to be edited or resizedusing any third party software. This brought us all back to the design board, looking around for good tools to achieve the same. Photoshop was out of question since we didn’t specialize in complicated image editing, but just simple re-size and minor graphic changes every once a while. Spending hundreds of bucks on Photoshop was not approved by the management.
Why IrfanView?
After several days of research and market study, I stumbled upon IrfanView, which overcame our expectations and proved to be a very light and useful tool ever developed for image editing. Moreover, it is FREE, what else can make the “management” happy!!!
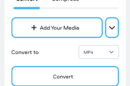
IrfanView provides a simple to use user interface which has very good image editing options like Resize, resample, change aspect ratio, built-in image effects, color corrections, conversion of color scales, and much more.
One important feature that I would like to mention here is that all these image editing and conversion functions can be achieved using keywords in batch files which really proves to be helpful when trying to achieve the same via a software application.
What is a BAT File?
For those unfamiliar with the term BAT files, they are small easy-to-write text files that carry out a series of commands. Even a layman with minimum computer skills can write a BAT script to perform multiple steps without a break or manual intervention.
Constructing a BAT file is as simple as opening a text editor like Notepad or Notepad++, typing in the commands that the Operating System understands and save the file with .bat extension.
To understand the various commands that are supported within a BAT file, you can easily find them on Google and there are millions of documents and sites that explain them in detail.
How I implemented BAT file for IrfanView?
Coming back to our requirement, we had an archive from the year 2002, with billions and billions of TIF images which had to be converted into JPEGs for further use. This was easy to achieve using a simple batch file (like below) and running multiple threads of the same to overcome the tedious task in a very quick turn around time.
An explanation of the above code: The batch file will take in 2 parameters as source and destination folders for TIF and JPEG images respectively. The first line will write out all the TIF images in the source folder to a text file. The next line will do the actual conversion of all the images in the text file and save it as JPG in the destination folder.
Capture Screenshot: In addition to the above features, IrfanView also has an option to capture your screenshot with every possible customization you can think of. I have been using another tool – Gadwin PrintScreen to capture customized screenshots of my desktop. But having this built into the imaging tool is beyond one’s expectations of a FREE software. See below for the various options available in this feature alone.

Finally, I would like to say that this tool has helped me out to complete my official requirement as well as being a useful tool for my personal blogging purposes. I would recommend this tool to all of you to give it a try and see what it has to offer.
Over To You
How important are images to your blog posts?
What are your sources for good resolution images?
For me, I sometimes end up taking my own pictures of appropriate subjects for my blog. That way I don’t have to worry about licensing and my images are even better since I know what I want to capture.
Do you also use image editing tools like GIMP or have you already come across IrfanView? If you use any other tools please do mention in your comment below so I can try them out.


Hello Atish,
Thanks for accepting and publishing my article. Appreciate it.
Images are a crucial part of blog posts 🙂 I will absolutely consider trying this tool for my upcoming blog post’s images.
Thanks Bob. Let me know how you find the tool and if it helps you with your images.
I have used IrfanView a few years ago. But, haven’t used in awhile. I will surely install it again. Thanks for the reminder, Praveen.
Super post!
Thanks Atish. I hope you like its features.