This post will teach you how to enable the Developer Options in your Android devices. You will also get an overview of few of the coolest thing you can do with Developer Options.
Few years ago Android smartphones took over the market by pushing Symbian phones on the back foot. Ever since Android has been launched, most of the mobile user started using it because Android smartphones have much more to offer which early Symbian phones didn’t have.
Android was launched on September 23, 2008 so it is nearly seven years old, and every one of you knows how popular it has become in these years. It is the leading mobile operating system being used worldwide.
Now coming to the topic, I am going to discuss the Developer Option in Android because it is one of the coolest features that every gadget freak would like to know and try out.
Developer options feature enables you to control your device to a higher extent. Whether you want to root your smartphone, want to get high-quality render for playing games or many other geeky features, you would need to work with Developer Options.
By default developer options feature is hidden but it is very easy to enable it. Let me tell you how?
Go to Settings >> About Device, and look for Build Number.
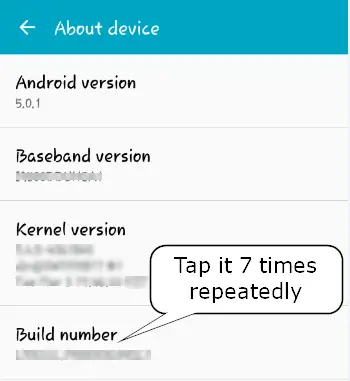
Now tap the build number 7 times repeatedly. It will show a small dialog box stating “You are now a developer.”
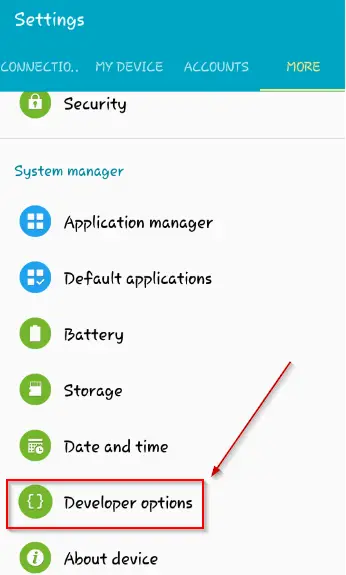
Enjoy! Developer options feature on your Android smartphone has been enabled. Now again go to Setting where you will see the Developer options just above the About Device option.
Tap Developer Options to explore it where you will be able to see so many options that you can use for different purposes. I have taken screenshot of the same:
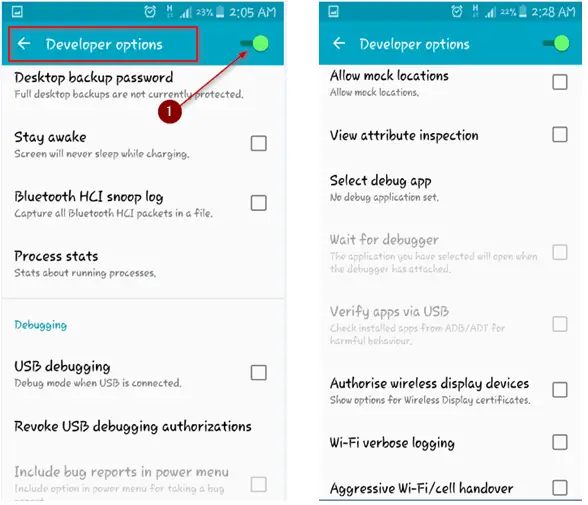
You can turn the options ON or OFF using that slide button marked in the screenshot.
There are many more options that are not visible in the screenshot. You may see all the stuff on your smartphone by moving the scroll below.
[color-box color=”white”] Recommended reading: Android or Windows Operating System – Which is Better?[/color-box]
Most of the people enable it to enable USB Debugging mode which is required for rooting, but it is much more than this. Let’s talk what else you can do with the Developer Options. Here I am mentioning the 7 awesome things you can do with Android Developer Options:
1. Enable and Disable USB Debugging
This option lets you enable the USB Debugging mode that allows your Android device to communicate with your computer using USB port via Android Debug Bridge.
To enable it, Go to Developer Options >> Tick Mark the USB Debugging check box. You will see a pop up asking “Allow USB debugging” which looks as:
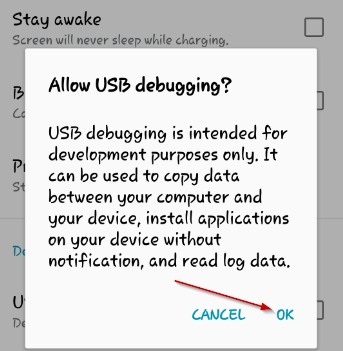
Tap on OK, and USB debugging will be enabled. If you want to disable it later, then do the same process and uncheck the USB Debugging check box.
2. Allow Mock Locations
At times you want to fake your GPS location, so to do it you need an app but to be able to use that app you would need to enable Allow Mock Locations.
You may do it by going to settings >> Developer Options >> Find Allow Mock Locations >> Tick the checkbox.
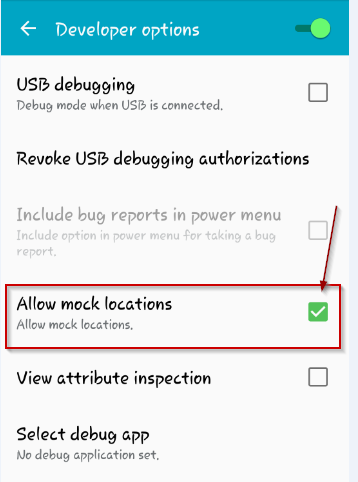
Now it’s enabled!
Enjoy faking your Locations!
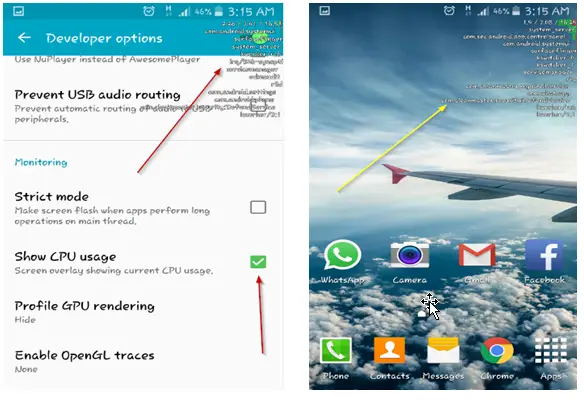
3. Display CPU Usage
You might have checked CPU usage of every process on your Windows computer. Now it’s time to check the same on your Android Device as well. Yes, you can see how your CPU is being used by different. As you can see in the screenshots, it displays as tiny text at the top-right side of the screen.
To enable this option go to Settings >> Developer Options >> Look for Show CPU usage tick mark the checkbox.
4. Create Desktop backup password
You can protect the backup if you take any, by using the option “Desktop backup password”. To set it, go to Settings >> Developer Options >> Look for “Desktop backup password” Then Tap it and it will show you the second screen shown in the screenshot below:
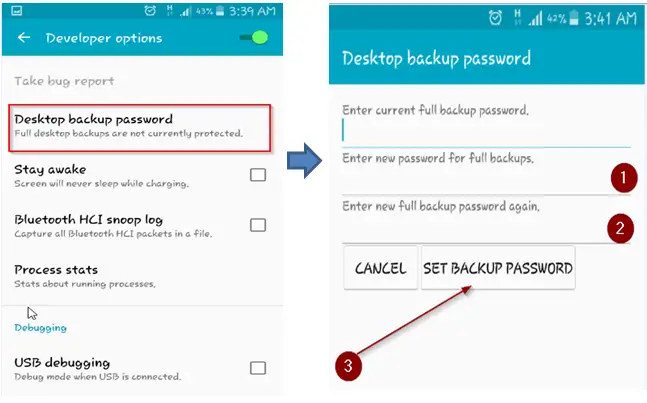
If you haven’t set up any password before then leave the first one which is “Enter Current Full backup password” and fill the next ones in which you have to enter the new password.
1 => New password
2 => New password again
3 => Click on SET BACKUP PASSWORD Button
And your backup is now password protected.
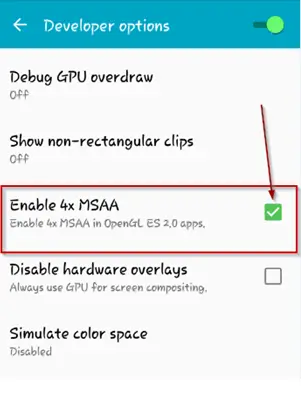
5. Enable MSAA for OpenGL Games
Many of us like to play high-end games, right? So why not enjoy high-quality rendering of the game’s graphics? You can enjoy the high quality rendering by enable 4x MSAA. Go to Settings >> Developer Options >> Enable 4x MSAA
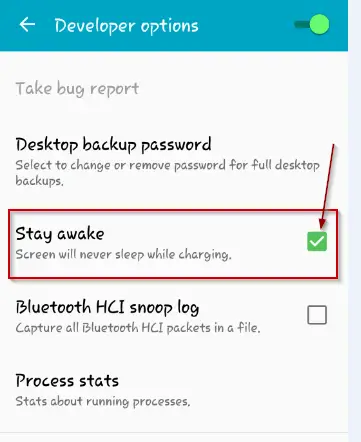
6. Stay Awake While Charging
Whenever you insert your charger’s pin into your Android device and starting charging it, the device’s screen gets turned off automatically. By using Developer Options, you can change the option to keep it turned on even while charging.
Go to Setting >> Developer Options >> Look for Stay awake >> Tick the checkbox next to it.
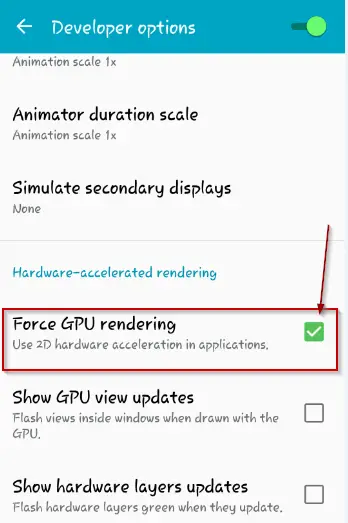
7. Force GPU rendering
You could force applications to use 2D hardware rendering even if they were written to not use it by default. It makes things look great but many times it obstructs the device badly. So be careful if you going to use it.
To enable it, go to Settings >> Developer Options >> Look for Force GPU rendering >> tick mark the check box next to it.
Conclusion
Developer options feature is hidden in your Android devices by default. You can enable it as you read earlier in this blog post. Be careful while using it because it is for advanced users. It might turn out to be hell if things go wrong so better be careful and make changes only if you are sure.
I am sure this blog post, preaching about the Developer Options and how to do awesome things with it, is well enough to entertain you and teach you many things at the same time.
Notes:
- I have mentioned only seven coolest things you can do with developer options but this is not the end, there are many more things you can do with it which you will find when you start using it.
- All the screenshots were taken on Samsung Galaxy S4 running on Android 5.0.1
Share your thoughts and ideas on this particular topic.


Useful option to trick using android device.
Faking GPS and displaying CPU usage are one of the option which I use to check with it frequently.
Thanks for sharing this!
>SK Lohar
Thanks for stopping by Shiv. Glad you liked it and already using few of them.
Hello atish
Great Post You wrote well step by step and this post help alot to fresh blogger.
Thanks For sharing
Regards
Kunal Shah
Thanks for sharing. I now know Android has some cool hidden features.
They are all great.!!
Great post for Android device tips. you have mention very nicely on this blogs. Thanks for sharing
Hello Atish,
Amazing post here. Thank you for sharing. I was completely unaware of this feature. I’m using developer option and it is very useful to operate my phone very well. The GPU rendering feature is awesome, it makes my phone looks great.
Thanks
Great Post . It is very useful for Android developers.i used these feature for better android apps.thanks for sharing this wonderful post.